MXA TECH SPEC: 10 THINGS ABOUT FINE-TUNING YOUR SUSPENSION

MXA TECH SPEC: 10 THINGS ABOUT FINE-TUNING YOUR DIRT BIKE SUSPENSION
You have to have a firm grip on the basics of suspension setup before you start worrying about the complexities of shims, base valves and cartridge rods. Here is MXA’s guide to suspension setup.
(1) Proper way to set sag. Setting sag is the one thing that every rider thinks he can do but normally does wrong. Here are some tips: First, always measure race sag the same way. It doesn’t matter if you are sitting or standing as long as you use the same method all the time and make adjustments based on those numbers. Measure the sag with the rider standing up. Second, bounce on the suspension before measuring race sag. Third, sit where you actually ride, not in some dream position. MXA uses a Slacker digital sag scale so we don’t have to rely on the bad math of whoever is doing the measuring. We drill a small hole in the rear fender to hook the digital cable to.
(2) The other kind of sag. Static sag is a measurement of how much the bike sags under its own weight. Static sag can only be checked after race sag is set. Static sag should be between 30mm and 40mm on big bikes. If you have more than 40mm of static sag, your shock spring is too stiff. If you have less than 30mm of static sag, your spring is too soft.
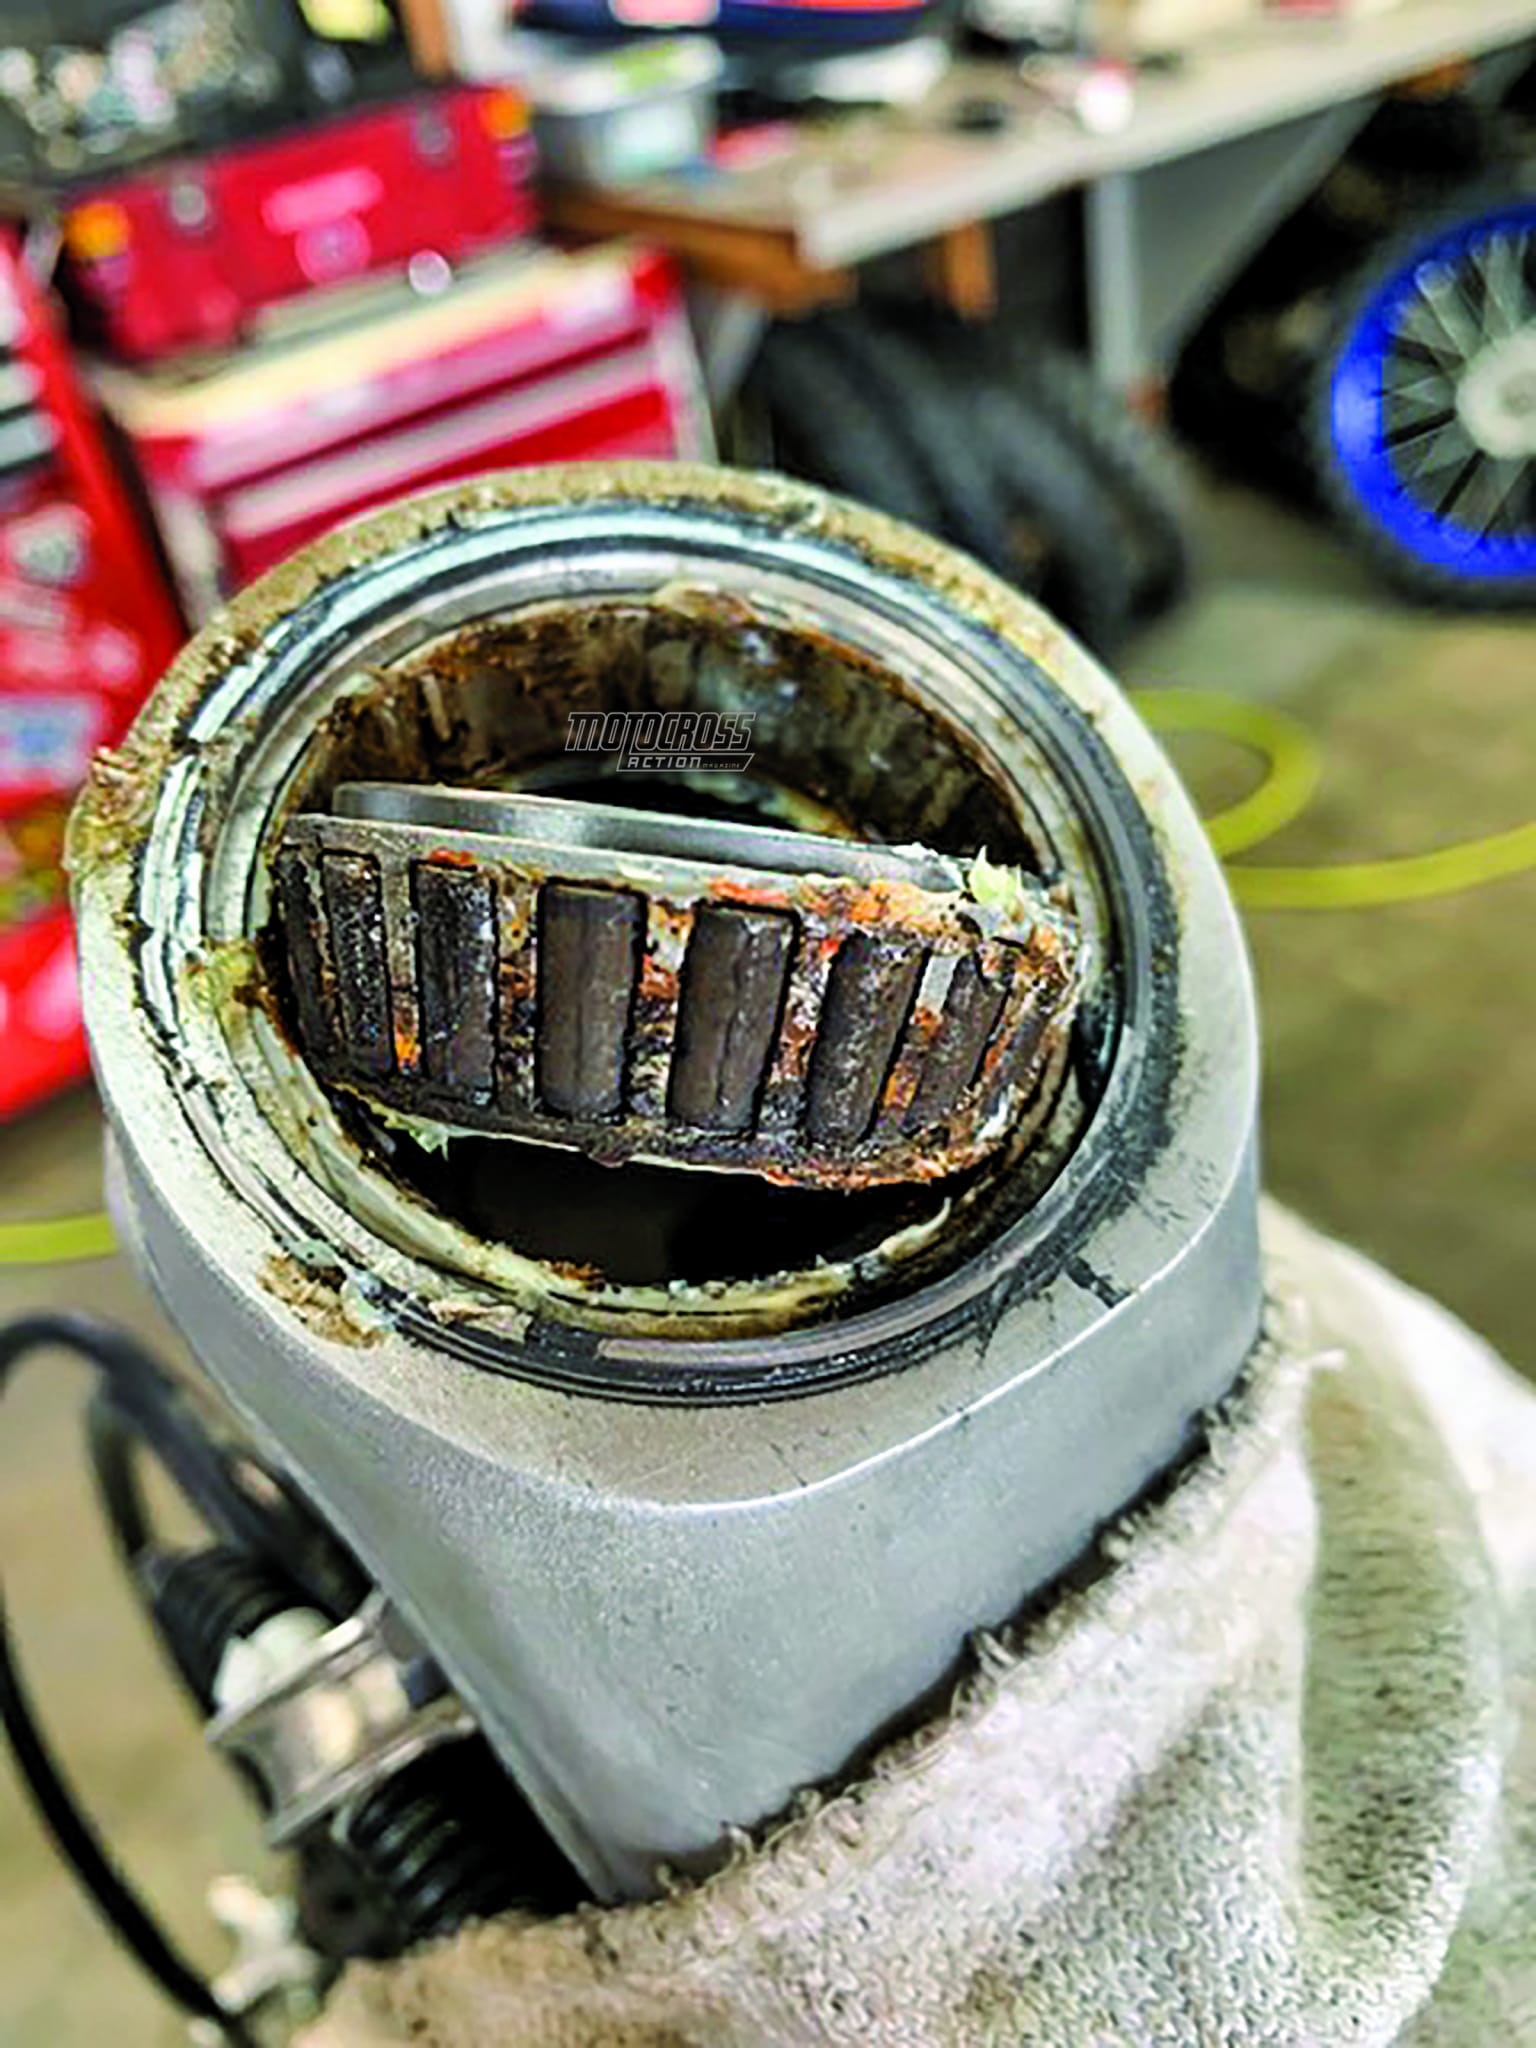
(3) Grease is your friend. Greasing your bike’s steering head, shock linkage and swingarm pivot periodically is the best way to ensure that every part is working to its fullest. Pressure washers and mud can get passed even the best seals.
(4) Poor man’s steering damper. Keep your steering-head bearing tight enough that the front end doesn’t flop over by itself. It should have to be pushed slightly before it moves. Your steering-head bearing is a cheap steering damper; use it.
(5) Tire pressure as suspension. We can’t tell you how many times a test rider has complained about his bike’s handling only to discover that he has a flat tire, low pressure or 25 psi in the tires.
(6) Oil versus air. To make forks stiffer, add oil. To make them softer, remove oil. Adding oil reduces the air space and makes the forks firmer at the end of the stroke. Removing oil increases the air space and makes the forks softer at the end of the stroke.
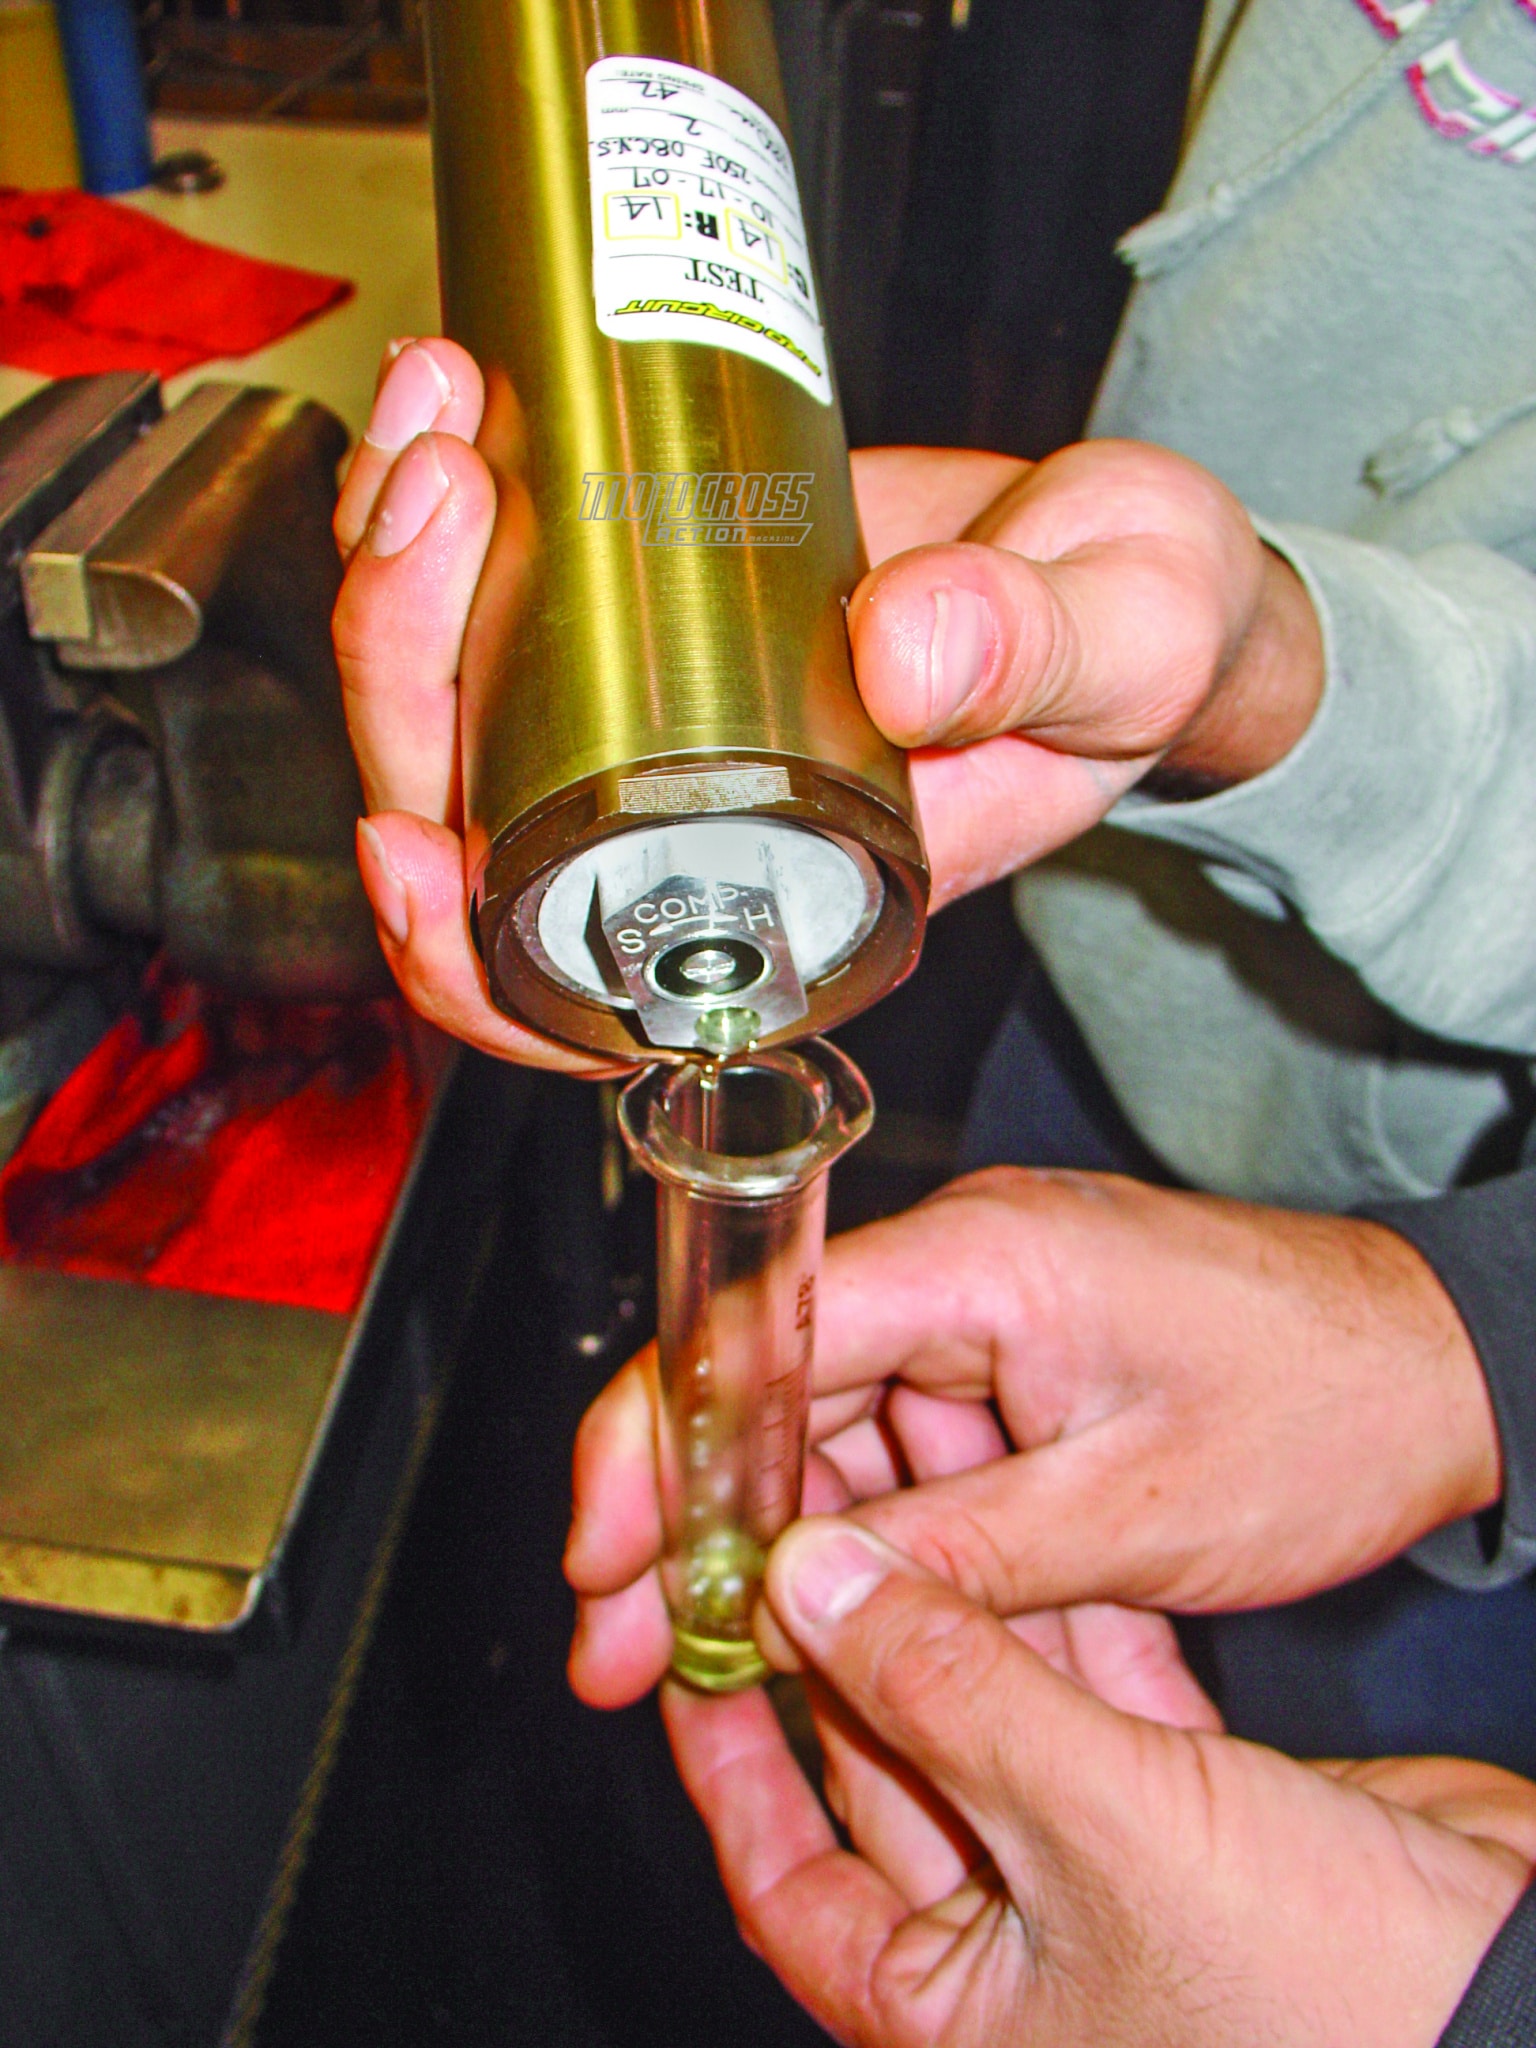
(7) Air-pressure buildup. All forks build up air pressure internally. To relieve the air pressure, release it with the front wheel off the ground and forks cooled down.
(8) Misaligned forks. It is critically important that your front axle not bind the fork legs. Most modern front axles accept a 19mm Allen socket. Buy one. When installing the front wheel, just hold the nut with a wrench and turn the axle with the 19mm Allen. Once you have the axle tight, tighten the fork dropout’s pinch bolts. By spinning the axle in, instead of spinning the nut on, you guarantee that the axle is not bound up in the dropouts.
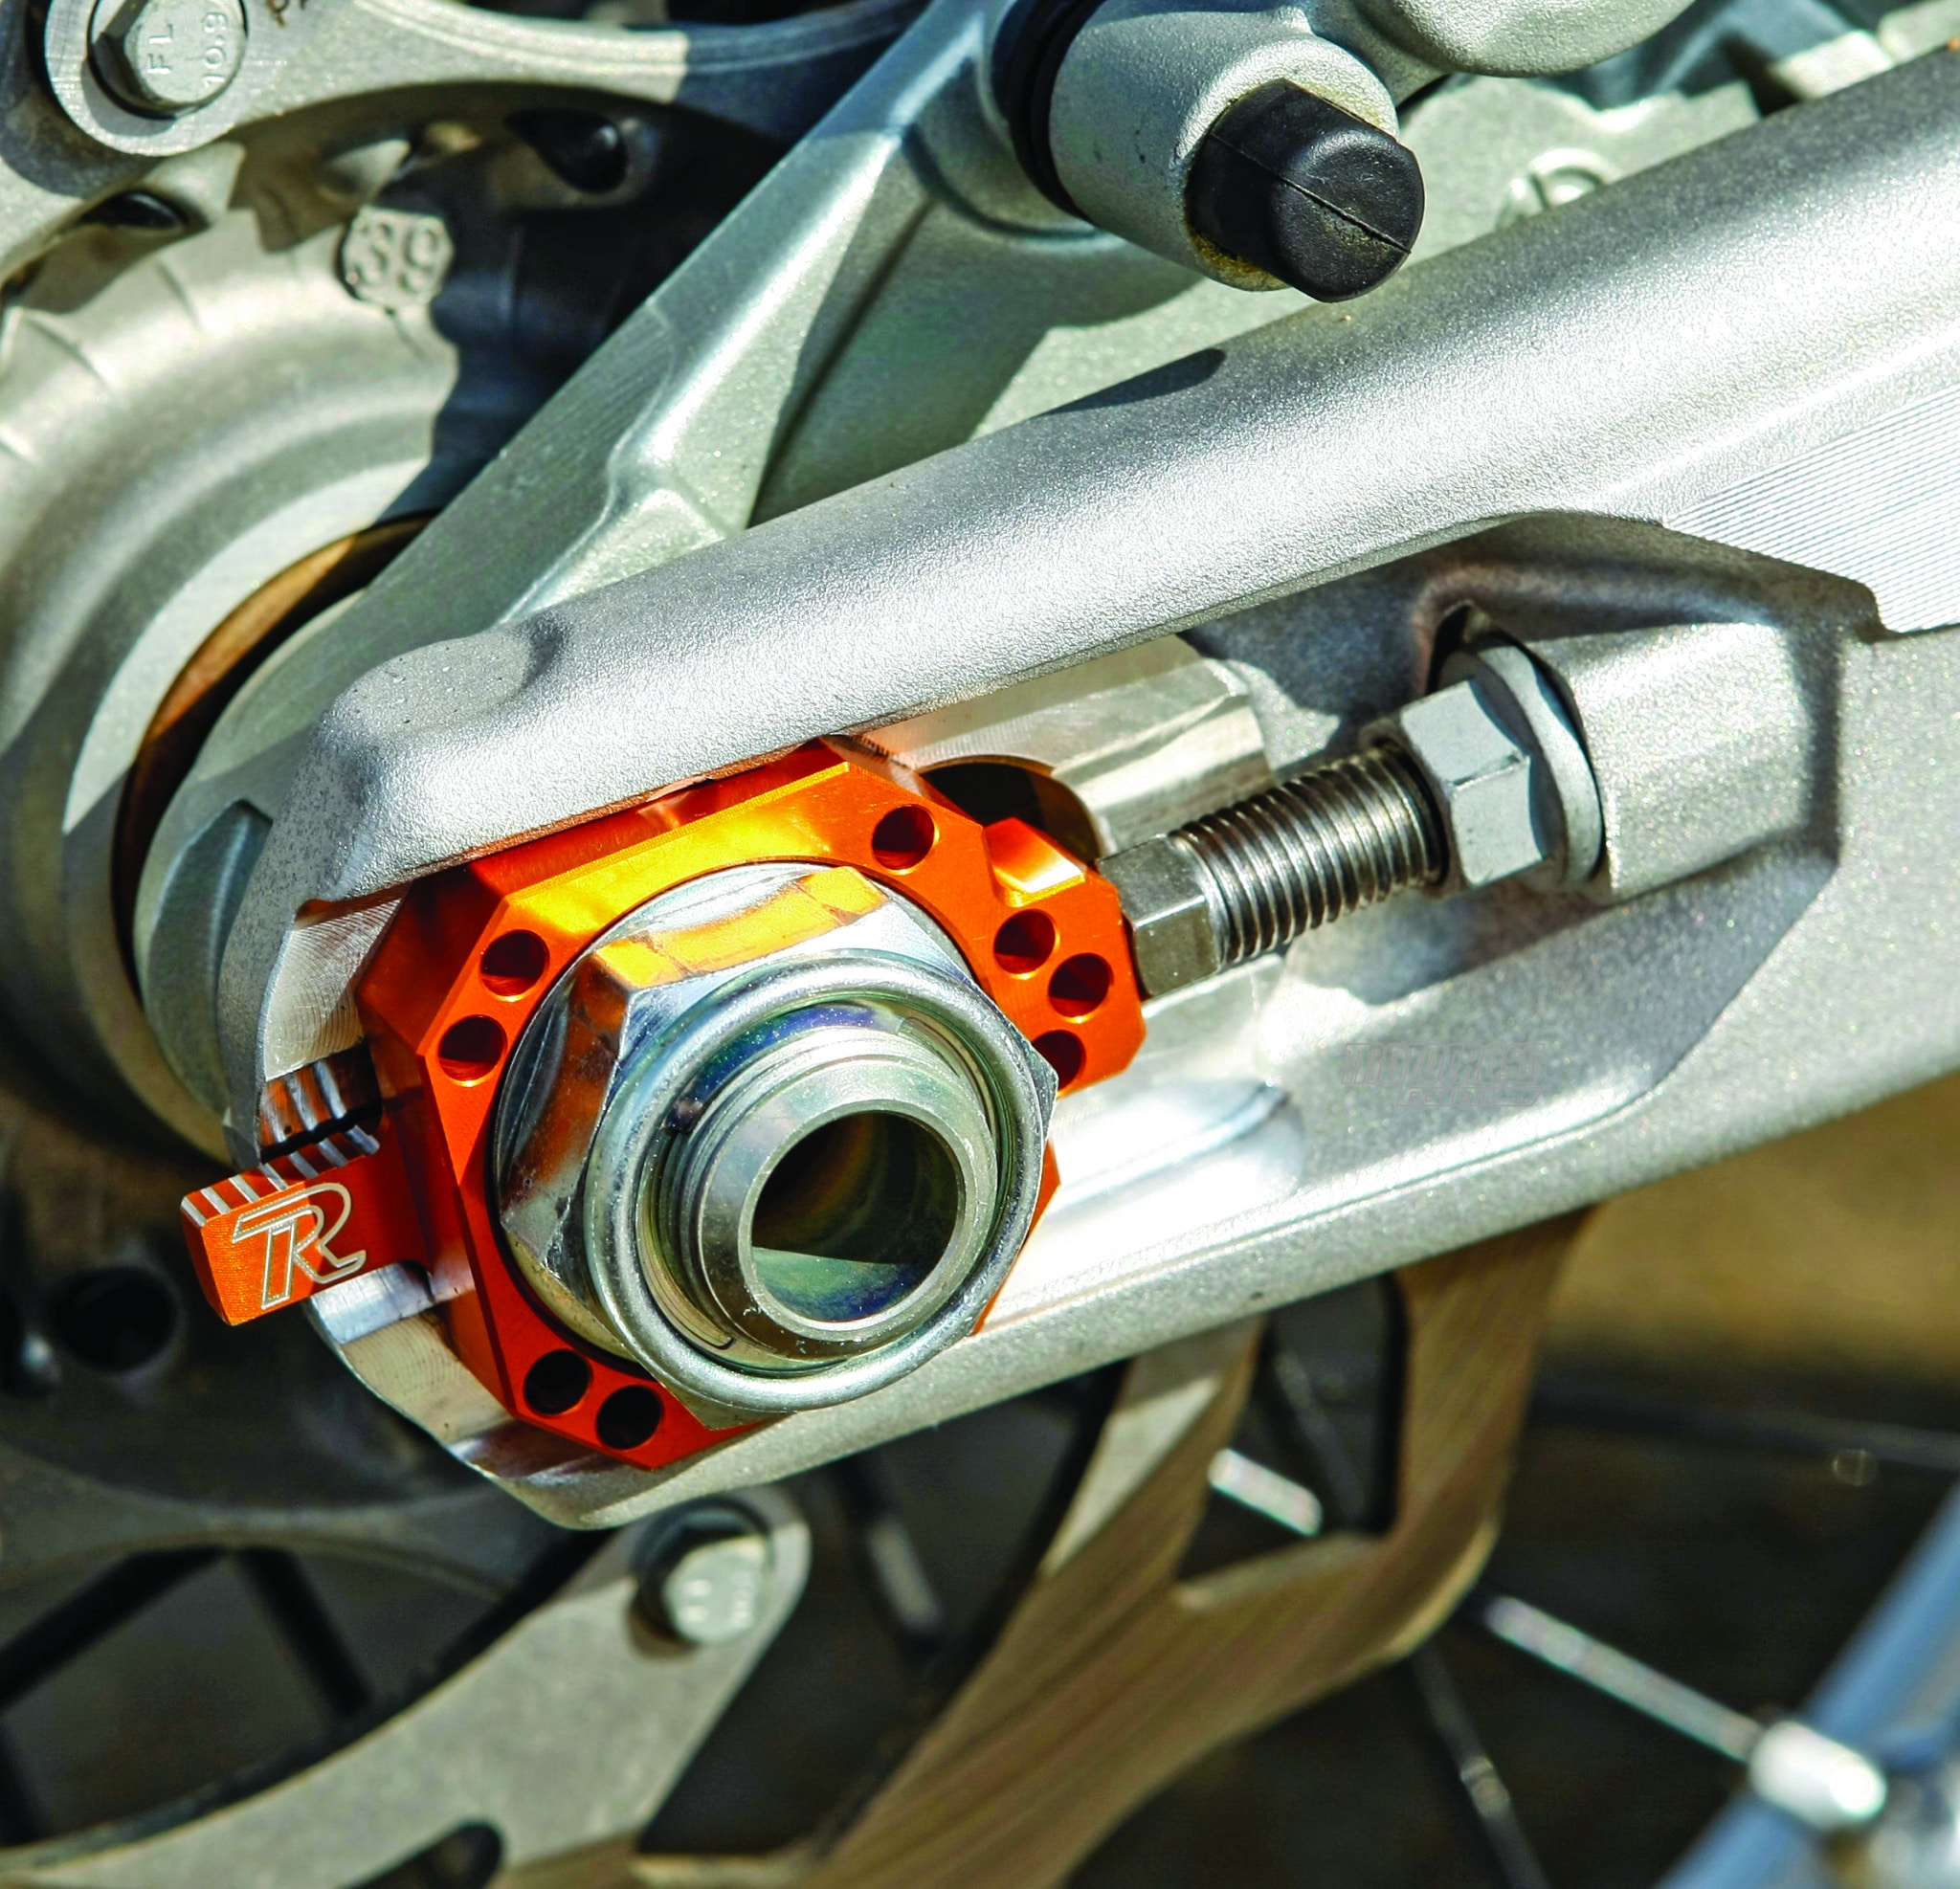
(9) Axle position. Axle blocks have over 20mm of fore/aft adjustment, and your shock will react differently when the rear wheel is all the way forward as opposed to all the way back.
(10) Softer is stiffer. Forks that are too soft ride on the firmest part of the fork’s damping system, which makes them feel stiff. When the forks feel stiff, the rider reflexively turns the clickers out to soften the forks. This makes the situation worse by making the forks feel even stiffer. Forks that are too soft feel stiff, when in reality they need to be stiffer to feel softer.


Comments are closed.