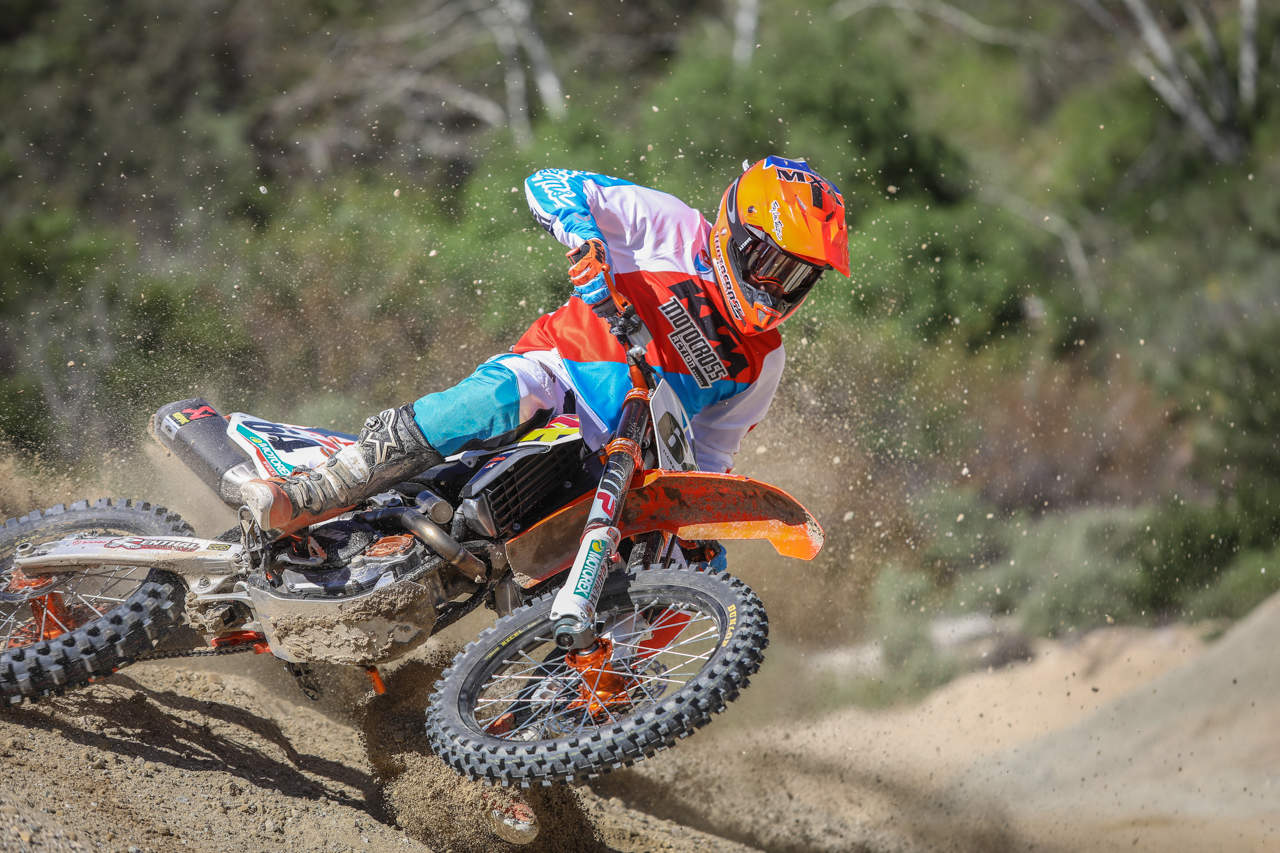
MXA LOG BOOK: SECRETS OF THE 2017-‘18 KTM 450SXF
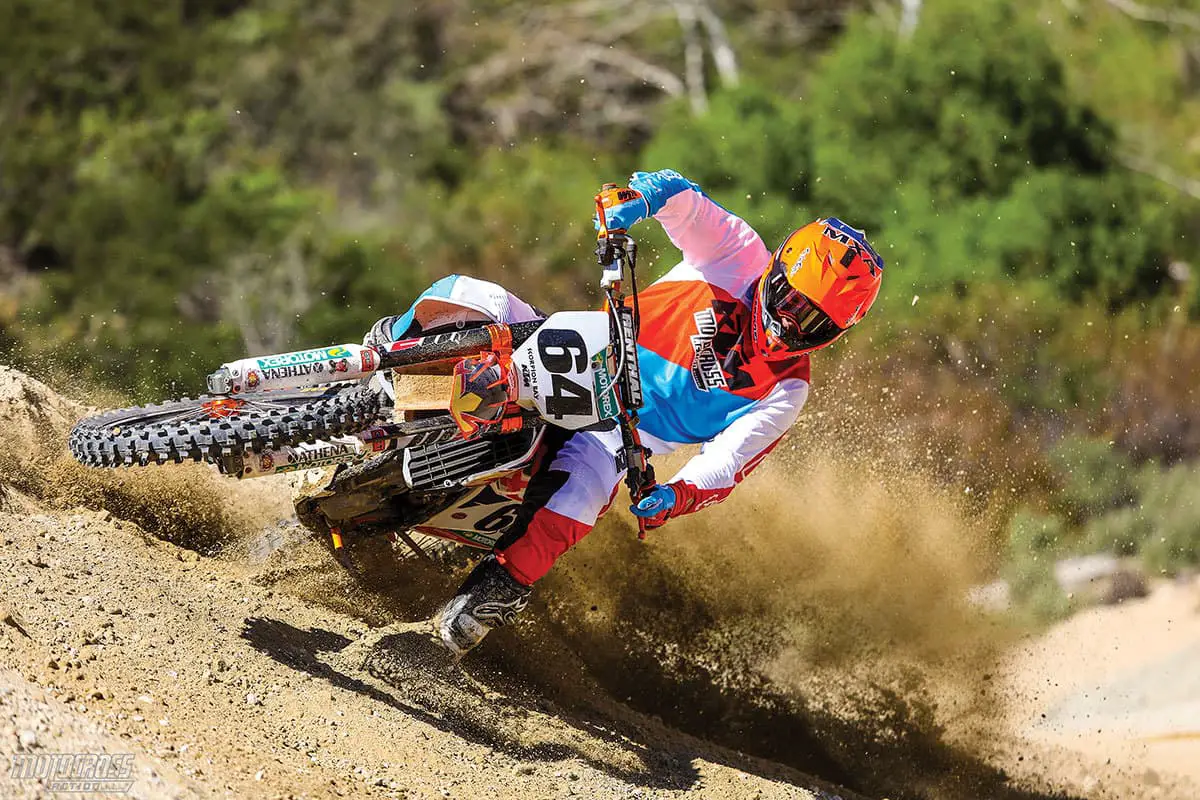
No bike is perfect when it rolls off the showroom floor, and that is as true for the KTM 450SXF as for the Yamaha YZ450F, Kawasaki KX450F, Suzuki RM-Z450, Husqvarna FC450 or Honda CRF450. We will forgive you if you thought that the class-leading KTM 450SXF was above reproach. Even though it is the best 450cc motocross bike on the track and the winner of the “2017 MXA 450 Four-Stroke Shootout,” no matter how good a bike is, the MXA wrecking crew always has issues that it wants addressed and problems it wants solved. We offer this as a racer’s guide to the 2017–’18 KTM 450SXF.
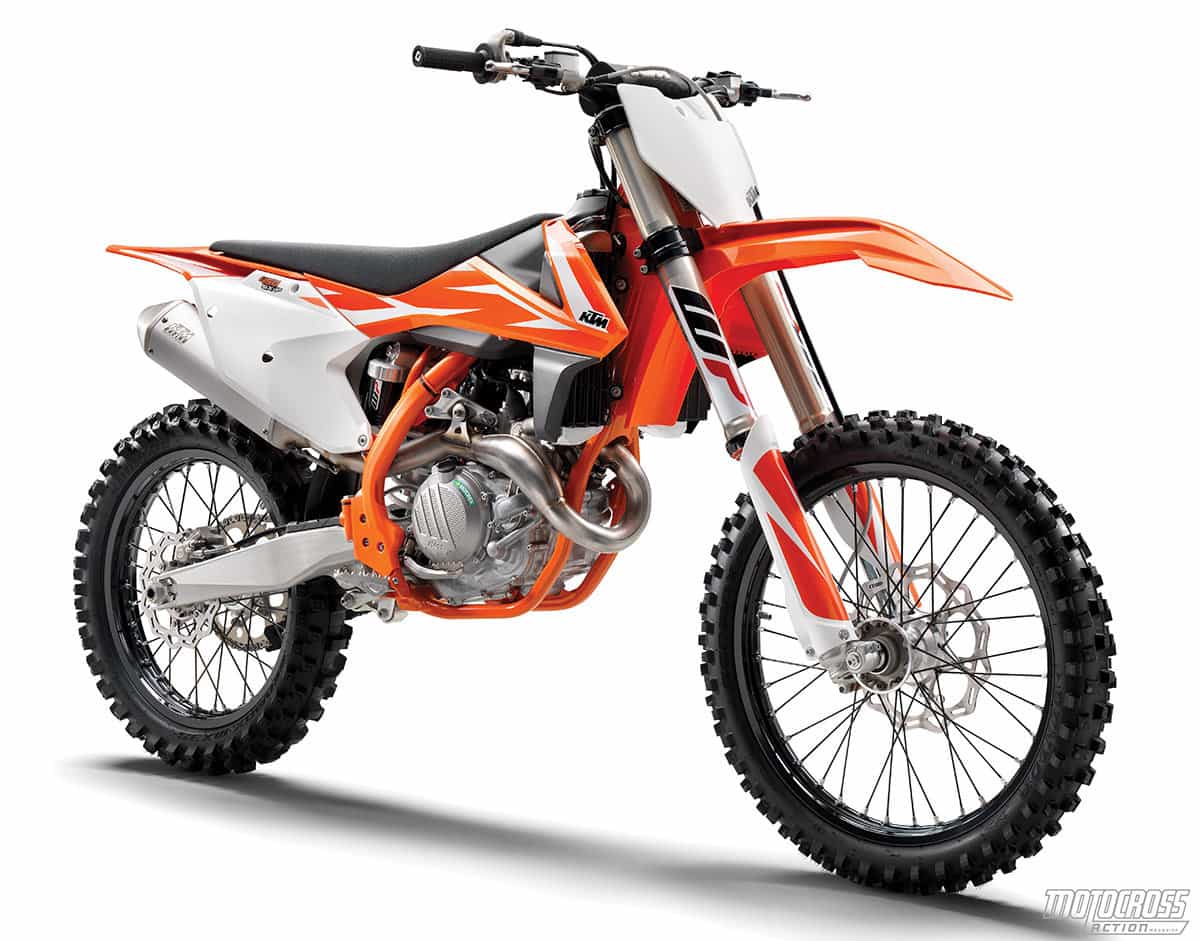
ALL THE GOOD STUFF
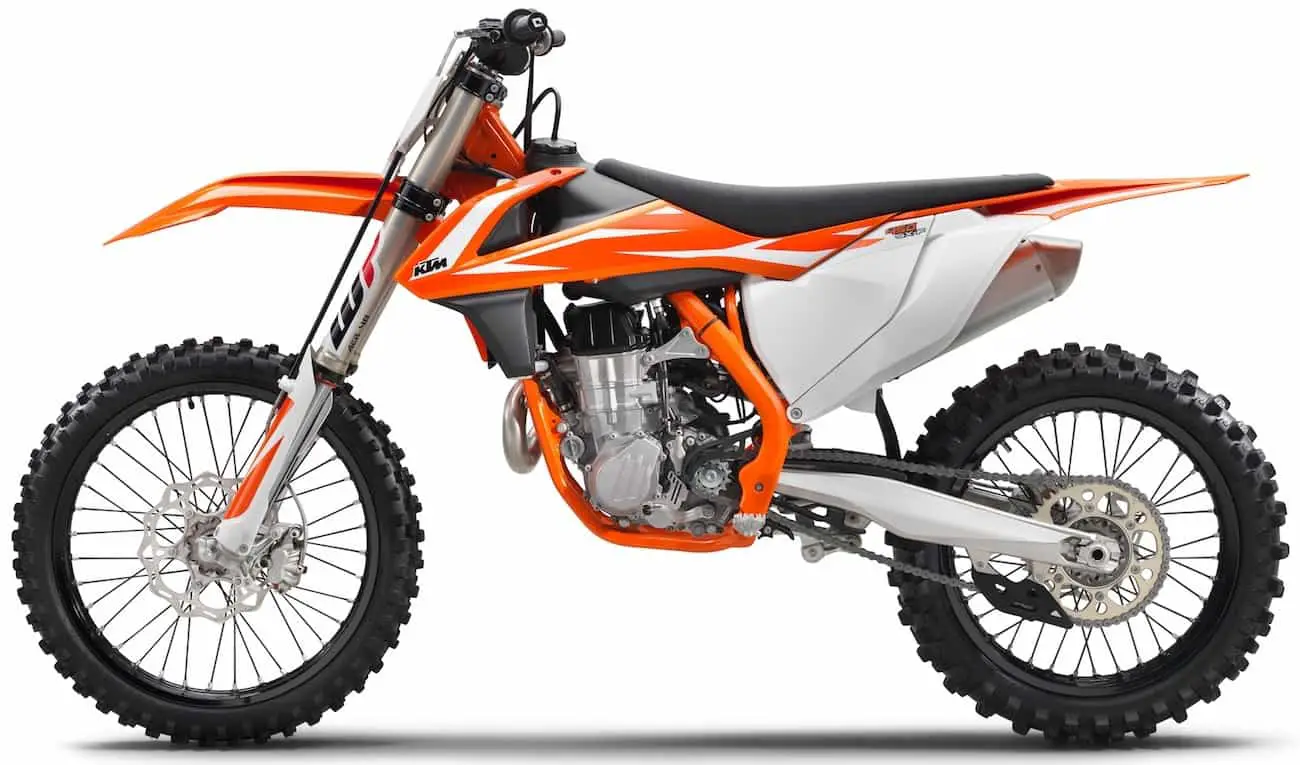
The 2017–’18 KTM 450SXF is the lightest and most powerful 450 made. It has a great hydraulic clutch. It has the best brakes. It makes the most torque. It makes the most horsepower. It has the broadest powerband. It has map, launch-control and traction-control switches on the handlebars. It has quick-release fuel lines. It has rubber-mounted bars. It has plastic frame guards to protect the frame’s paint. It has direct-connect throttle cables to reduce lag time. It has in-line fuel filters. It is the lightest bike on the showroom floors—in some cases, 18 pounds lighter than the competition. It has the best handling of any bike on the track. It has an air filter that requires no tools to remove. It has—well, you get the idea.

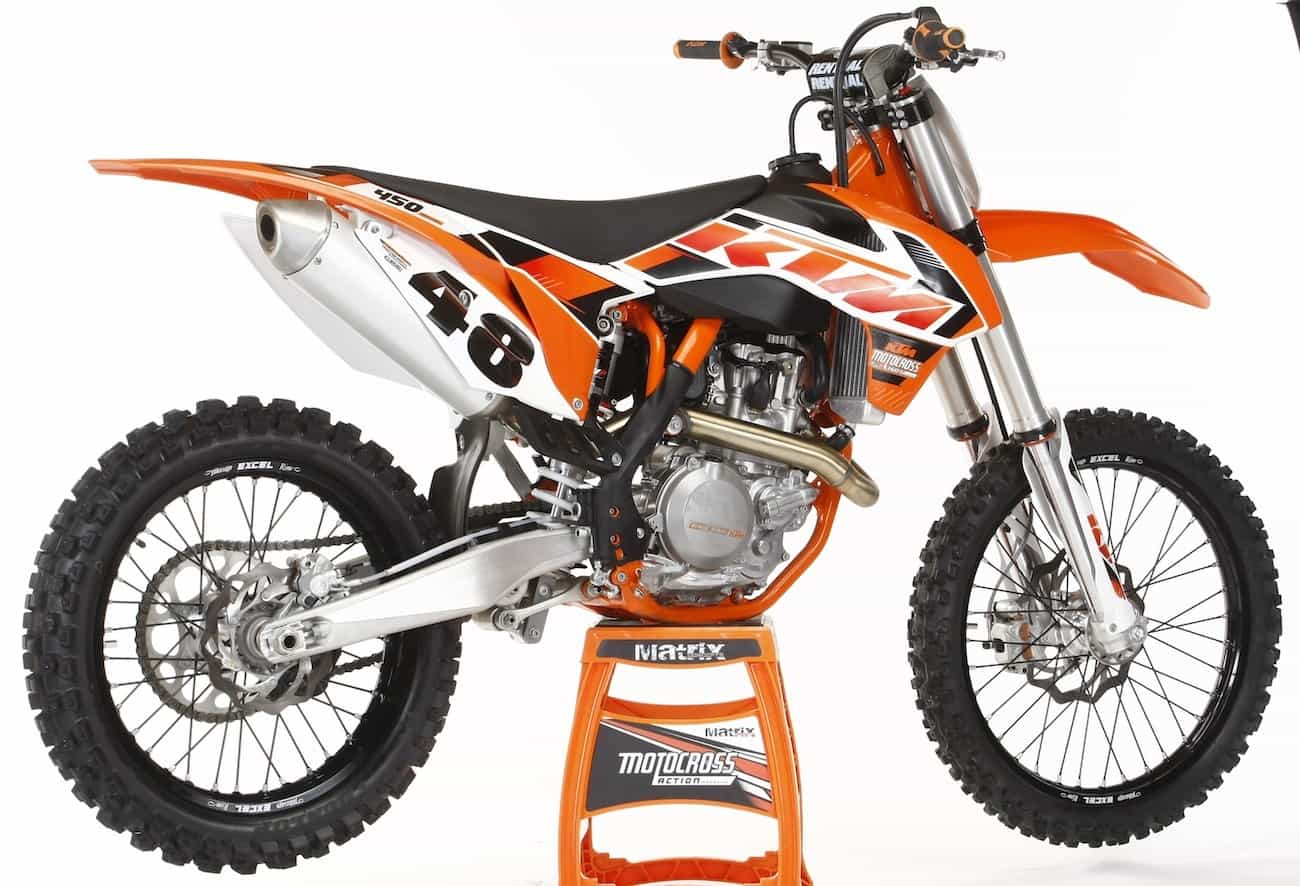
IF YOU HAVE A 2016 KTM 450SXF
If you own a 2016 KTM 450SXF, you have 90 percent of a 2017–’18 model, but you might look into making these changes:
(1) Condenser. In 2016 KTM switched to a smaller condenser from the previous years. This new condenser proved to be erratic. It is easy to upgrade to the large condenser that comes on the 2017–’18 models. It is KTM part number 777-110-3500.
(2) Forks. The 2017–’18 KTM 450SXF gets WP AER front forks, while the 2016 came with WP 4CS forks. WP’s air fork is the best air fork made, and it saves over 3 pounds, but there are suspension tuners who can make 4CS forks work.
(3) Shock spring rate. The 2016 KTM 450SXF and 2016-1/2 Factory Edition came with the 48 N/m shock spring. This spring was too stiff for anyone under 180 pounds. The 2017–’18 450SXF has a more appropriate 45 N/m spring.

There are some 2017–’18 things that you don’t need to upgrade on your 2016 KTM 450SXF.
(1) Triple clamp. The top triple clamp is more rigid in 2017 than it was in 2016; however, this is one of those subjective things that most riders wouldn’t notice.
(2) Handlebar clamps. In 2016 the handlebars were mounted to a one-piece-lower bar mount with two separate top bar mount clamps. For 2017–’18 the bottom bar mounts are now two separate pieces while the top bar mount is one piece. They both twist in a crash. We run the 2016 one-piece bottom bar mount witht he 2017-’18 one-piece top mount.
(3) Map switch. The 2016 450SXF had the flick-style selector switch that toggled back and forth between two maps (and launch control). In its place for 2017–’18 is a multi-switch on the left side of the bars that toggles between two maps, launch control and traction control. It doesn’t matter how you activate the features—so, it’s six of one and half a dozen of the other.
(4) Rear brake pads. Many racers felt that the 2016 rear brake pads were too grabby, so the 2017–’18 brake pads are less aggressive. If you agree, switch to 2017 pads when your 2016 pads wear out.
(5) Head stays. The 2016’s head stays are steel. The 2017–’18 head stays are cast aluminum. The aluminum saves 60 grams, and the stays retrofit on the 2016 model if you really want them.
(6) Brake pedal. The 2017–’18 rear brake pedal is 10mm longer than the 2016 pedal. Owners of 2016 KTMs can order a 10mm-longer brake tip from 7602 Racing that does the same thing (www.7602racing.com).
THE KTM 450SXF TIMELINE
Do you wonder if the latest-model KTM 450SXF obsoletes the one you own or the one you could buy on the used-bike market? Here is a quick guide.
(1) The 2018 KTM 450SXF does not obsolete the 2017 model. For the most part, they are the same, save for some minor fork and shock valving changes.
(2) The 2016 KTM 450SXF is virtually the same bike as the 2017–’18, with the exception of the forks and weight. The 2016 came with 4CS forks, which were 3.6 pounds heavier, but if you have had your 4CS forks worked on to your satisfaction or switched to Cone Valve forks, you are good to go.
(3) The 2016-1/2 and 2017-1/2 Factory Editions are, for the most part, the same basic bikes as the 2018 save for some fork valving and shock spring rates.
(4) Any KTM 450SXF previous to the 2016 model (2015 on back) is heavier and slower.
THE TORX CONUNDRUM
KTM is the only manufacturer to use Torx bolts (save for Husqvarna). Why do they use Torx? Because an efficiency report at the factory found that the star-shaped head of the Torx design sped up the production line because the workers didn’t have to be as accurate to get the air wrenches to engage. Luckily, in most cases, the Torx head is built into a conventional 8mm, 10mm or 13mm bolt that can be spun off with a T-handle; however, this is not true in the case of the ODI lock-on grips (#15 Torx), fork air-bleeder screws (#20 Torx) or subframe bolts (#45 Torx).

HOW TO TURN YOUR 2017 KTM 450SXF INTO A 2018
If you wanted to spiff up your 2017 KTM 450SXF to pass as a 2018 model, here are the steps you’d need to take:
(1) The 2018 frame is orange. If you want to have your 2017 frame powdercoated to the correct orange, the color code is RAL2009.
(2) The 2018 KTM comes with a more powerful Sky Rich HJTZ5S-FP battery that replaces the 2017’s lighter-duty Samsung C22S battery. If you live in a warm climate and don’t have trouble starting your KTM when it’s cold, you can skip this. But, if you have cold-starting issues, you will need the 450XC battery tray to hold the larger Sky Rich battery. WPS offers an aftermarket battery that will fit in the existing 2017 battery tray that almost doubles the cold-cranking amps of the stock Samsung battery. It retails for $119.
(3) The 2018 AER air forks have different valving from the 2017 forks, but it is a simple change that any suspension tuner can achieve without having to reinvent the wheel.
(4) Obviously the graphics have changed, although the plastic remains the same. You can order a 2018 radiator shroud from your friendly local dealer or design your own graphics.
(5) The radiator louver have been changed so that dirt and mud can fall out of the bottom of the louver. You can achieve the same thing on the 2017 louvers by drilling holes in the bottom cross piece.
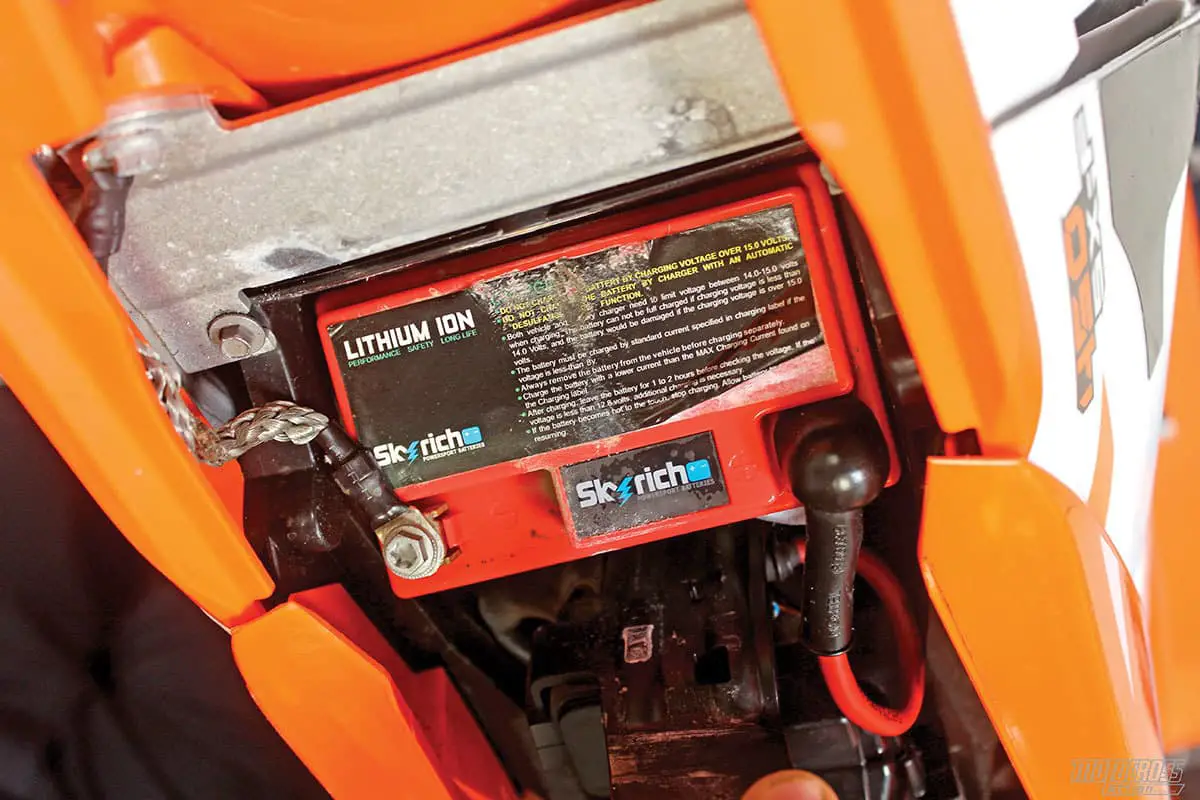
IS IT REALLY LITHIUM-ION OR SOMETHING ELSE?
Although the manufacturers like to say that their electric-start bikes have lithium-ion batteries, that isn’t completely accurate. They are, in fact, LiFePO4 batteries. LiFePO4 stands for lithium (Li), ferrous (Fe) and phosphate (PO). Once we redefine ferrous as “iron,” you have what is known as a lithium-iron phosphate battery. Don’t confuse a lithium-iron phosphate battery with a lithium cobalt-oxide battery. The more expensive lithium cobalt-oxide batteries are used in computers, cameras and phones. For motocross bikes, lithium-iron phosphate is a better choice because it has a longer calendar life, quicker recharge rate, higher peak-power rating and costs less.
THE COLD-WEATHER-STARTING TRICK
There is a trick to helping any LiFePO4 battery generate enough cranking power to start your KTM in cold weather. It is possible to increase the voltage output of an iron-phosphate battery by warming it up. How do you warm up a battery? We touch the starter button enough to activate the fuel pump but not enough to get the bike to turn over. You can hear the pump clicking over (or feel the vibrations with your hand on the gas tank). We do this three times at 20-second intervals. Since iron-phosphate batteries get stronger as they get warmer, your bike will start quicker on a cold day with the extra voltage. Whatever you do, don’t push the starter button and hold it in hopes of the bike starting. Grinding away with the starter motor is a surefire way to end up with a dead battery. If it doesn’t start in a few seconds, stop, wait and press the button again.
MORE ON THE IN-LINE FUEL FILTERS
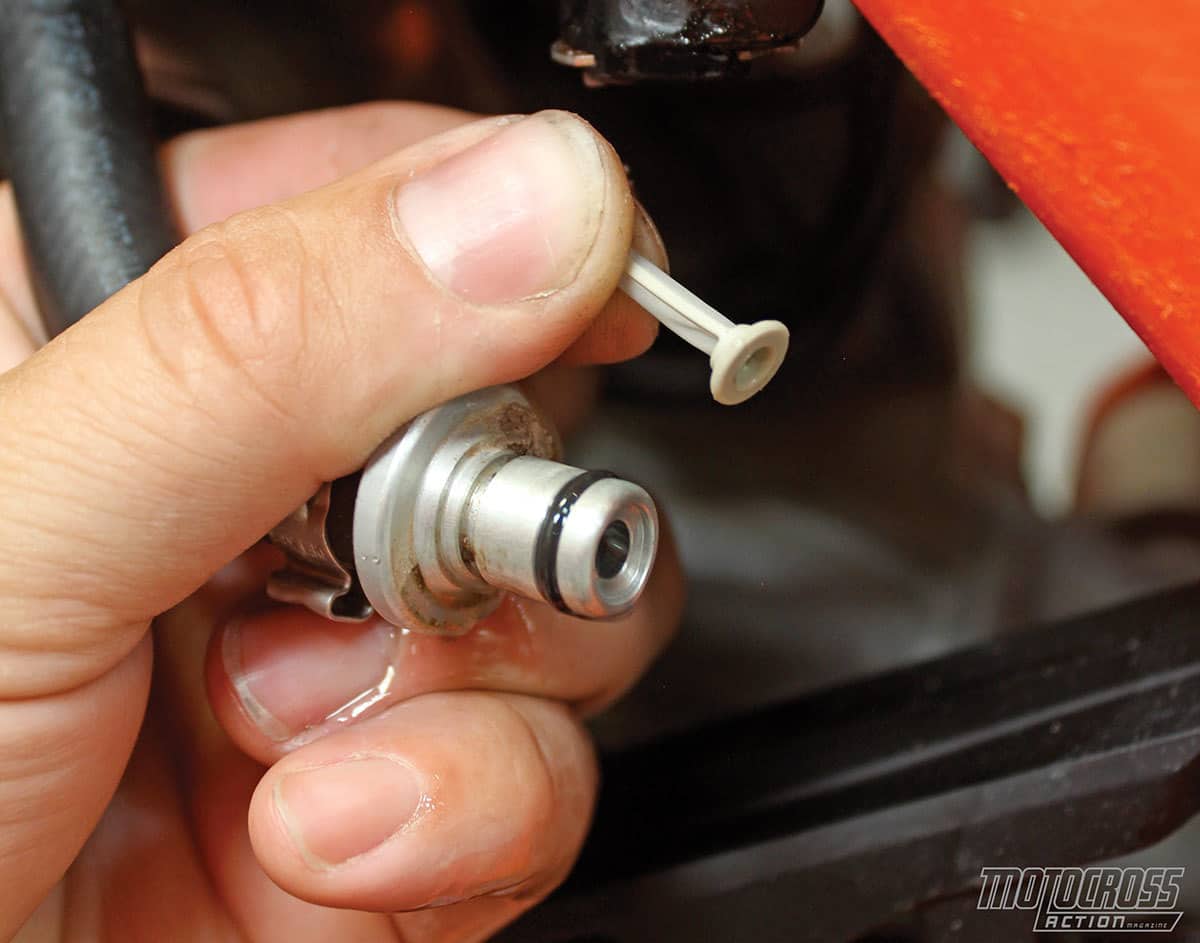
KTM installs inline fuel filters in its gas lines. They can be accessed via the quick-release fitting on the fuel line. Once you separate the fuel lines, you can flick the small nylon fuel filter out and check it for debris. The filter can be back-flushed or replaced. Clogged filters hurt the fuel pressure and flow. If your bike is sluggish to start, check the fuel filter first. One important caveat: be very careful to make sure that the fuel line’s quick-release fitting clicks back together completely. We have had the quick release pop off because we didn’t get it clicked properly. When the fuel line pops off, the engine stops almost immediately. Click it!

AIRBOX ISSUES
Everybody knows that the KTM 450SXF’s twin, the Husqvarna FC450, can get better throttle response and increased power if you drill holes to allow more air into the Husky’s plastoc airbox. Guess what? The same holds true for the KTM airbox, albeit to a lesser degree. MXA doesn’t drill holes in the KTM airbox, but we cut off the deflector wall on the inner surface of the airbox cover to improve airflow. Additionally, we have noticed improved throttle response by removing the wire backfire screen. Unfortunately, this is a difficult job, so you might just want to order the KTM two-stroke air-filter cage (it doesn’t have a backfire screen).
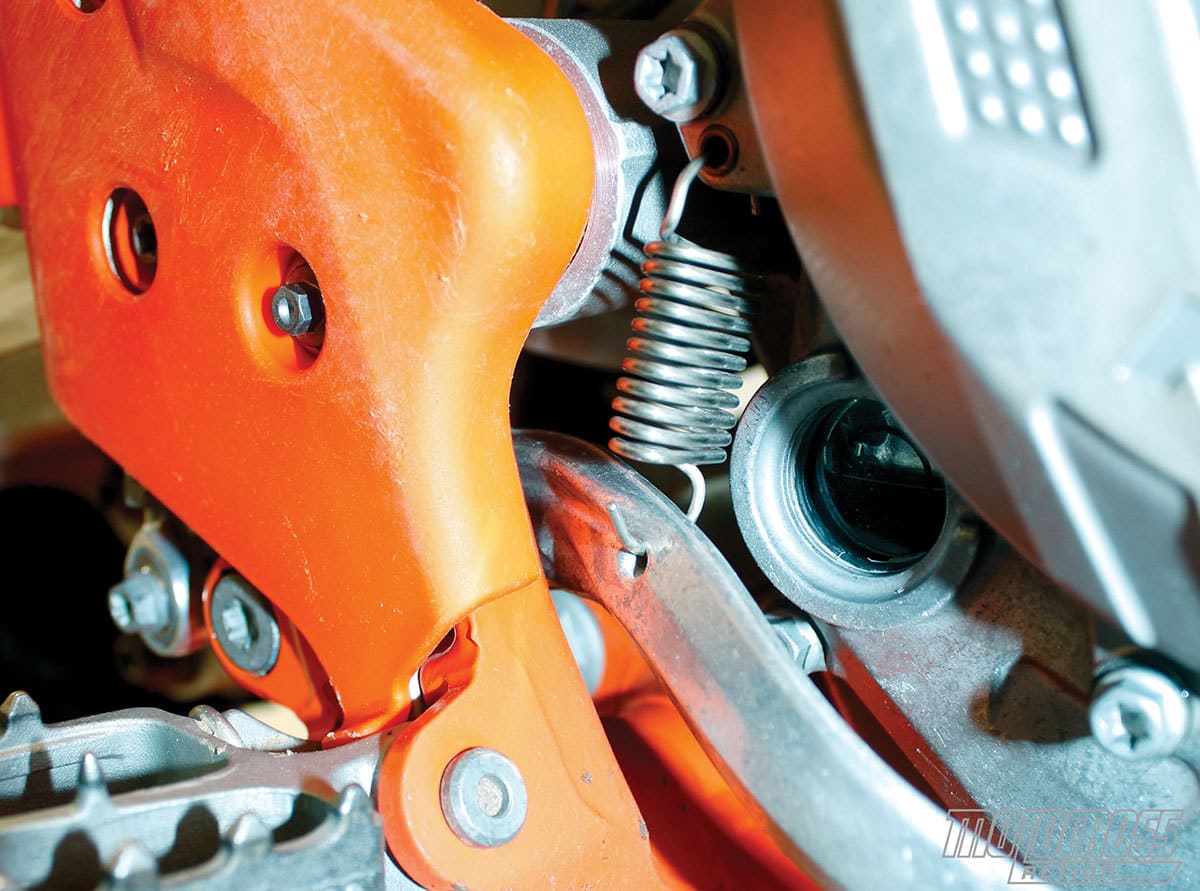
FOOTPEG SPRING BREAKAGE
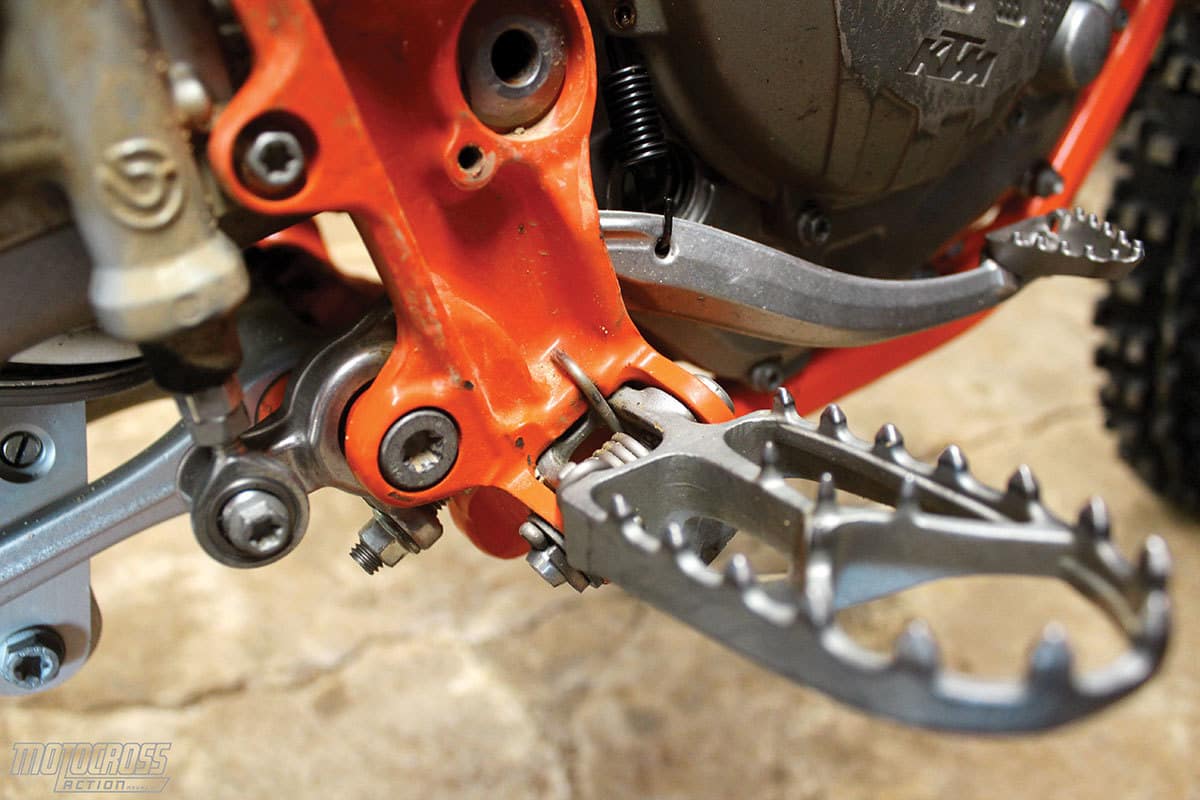
Many riders have broken 2017 KTM footpeg springs, but it is not the fault of the footpeg springs. If you suffered broken footpeg springs, it is because you or your KTM dealer put the footpeg springs on wrong. Many KTM dealers have been installing the 2017–’18 footpeg springs the same way they did the 2016 footpeg springs. When they do that, the new springs break. To check if your footpeg springs are installed correctly, peel back the plastic frame guard and look at where the footpeg spring hooks to the frame. The tang of the spring must hook in the frame cavity above the footpeg (see above). If it isn’t visible, it is installed wrong.

HOW TO TIGHTEN THE BAR MOUNTS
The bolts that go downward through the bottom handlebar mount and triple clamp are not indexed to lock in place. Thus, if you try to tighten the bar mounts by turning the 17mm nuts underneath them, the bolts will spin. To truly tighten the bar mounts, you need to hold them securely from above. Here are the steps: (1) With the bars removed, reinstall the one-piece top clamp to keep the bottom bar mounts aligned. (2) Through the hole in the one-piece top bar clamp, insert a #45 Torx wrench into the bar-mount bolt. (3) While holding the #45 Torx bolt tight, turn the 17mm nut to tighten the bar mounts.
WATCH THE WIRING BEHIND THE FRONT PLATE
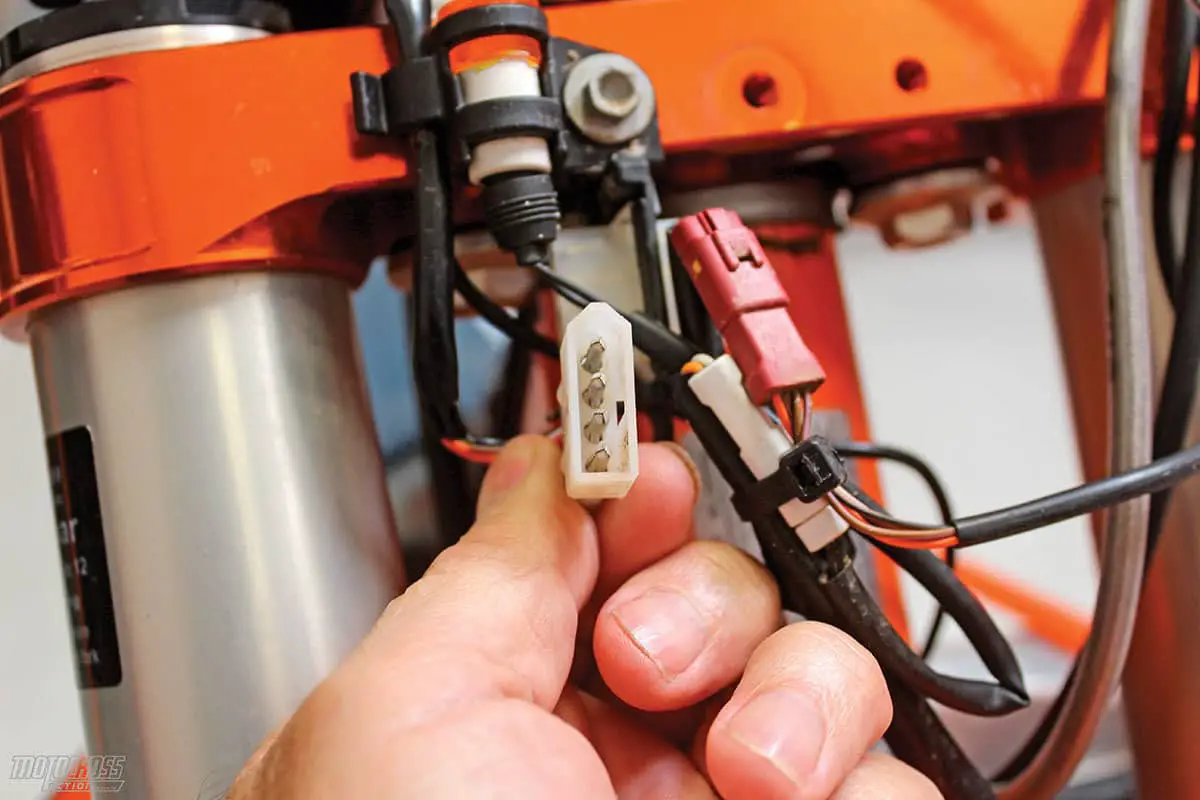
If your KTM 450SXF suddenly won’t start, even though it started earlier in the day, you should check to make sure that the battery isn’t dead. If this isn’t the cause, the next place to look is behind the front number plate. Behind the plate there is a white plastic fitting that the starter button wiring connects to. Follow your starter button wire to the fitting. It isn’t uncommon for this wire to pull out of the male/female plug. The most common cause of this wire failure is the wire getting hooked on a tie-down or not being routed so that it can move freely when the bars turn. Once you fix the wire, your bike will start like a champ.
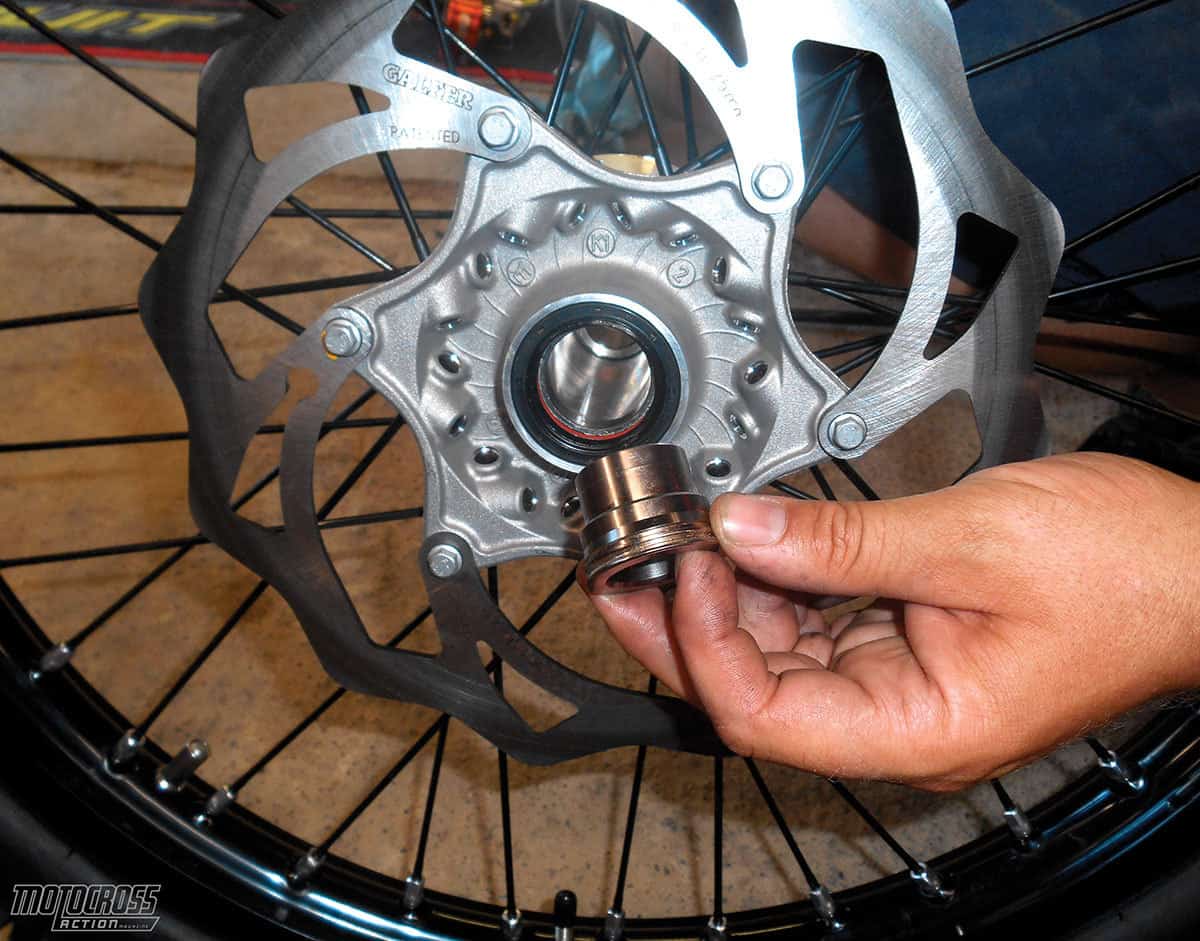
KTM WHEEL-SPACER MAINTENANCE
KTM has awesome wheel spacers. Unlike on a lot of motocross bikes, KTM’s wheel spacers run on the bearings, which means that the front and rear wheels can accept different axle sizes just by changing the wheel spacers. This makes older KTM wheels compatible as spare wheels on new-model KTMs (and vice versa). There is a caveat to KTM wheel spacers. The wheel spacers need to be greased for two reasons: (1) Because the wheel spacers live in the dirtiest place on a motocross bike, they can seize to the bearing and wheel. In this case, when you try to get the wheel spacers off the wheel, the bearing and seal will come out also. Not good. (2) Since the wheel spacers run against the seal, they need a dab of grease to keep the spacers from wearing away the rubber on the seals. Both of these problems are solved by regular maintenance and a little grease.

DUNLOP MX3S WARNING
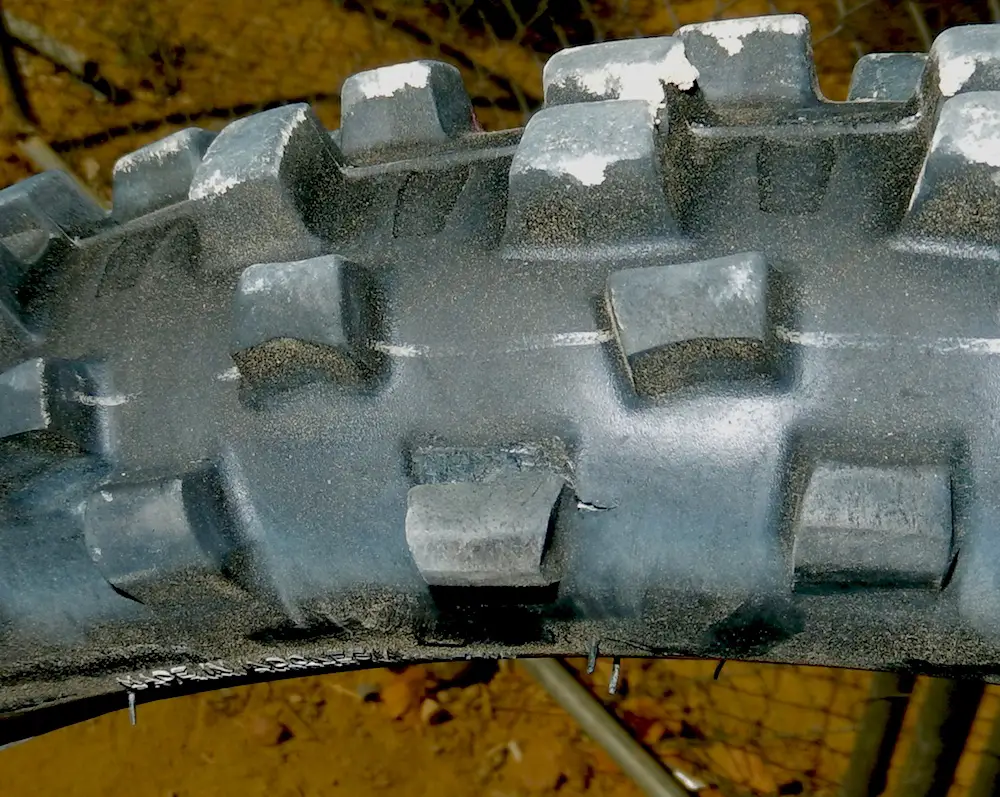
The MXA wrecking crew loves the MX3S (previously called MX32) tires that come stock on the KTM 450SXF, especially the front in comparison to the MX52 that came as OEM equipment on earlier models. But, be forewarned; if you push the MX3S front out of its intermediate terrain, you will begin to lose side knobs off the front tire. Oh, don’t get us wrong; the MX3S works well on hard terrain, but just not for long. If the side knobs tear off and you don’t notice, you will lose the front end without any warning. These are race-quality premium tires—and when used on the wrong terrain they will wear prematurely.
 Although KTM runs Dunlop tires, the bikes come with ultra-thin Pirelli tubes. These tubes have a high failure rate on rough tracks. We replace them with STI Heavy Duty tubes.
Additionally, almost every tire manufacturer specs a 120/90-19 rear tire on its 450cc four-stroke, including KTM, but every MXA test rider prefers to run a 110 rear tire. Why? A 120 is harder to roll over in turns and makes the bike stand up more in ruts.
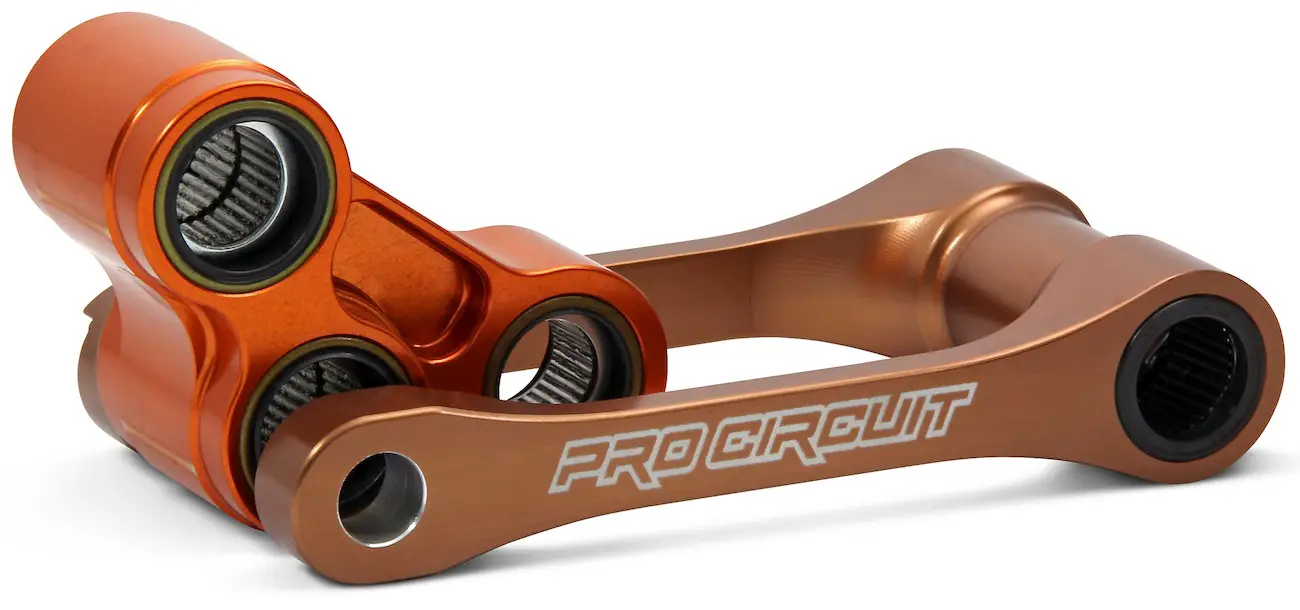
LONGER SHOCK LINKAGES
Most MXA test riders prefer to run a longer shock linkage on the KTM 450SXF. The longer link not only lowers the rear of the bike by half an inch, but it stiffens the initial part of the shock stroke to hold the rear higher to offer more effective travel. This is important to riders who fall somewhere between the 45 N/m shock spring on the 2017–’18 model and the 48 N/m shock spring on the 2016 model. Plus, with a lower rear end, we had more range in changing the head angle with fork-height settings.
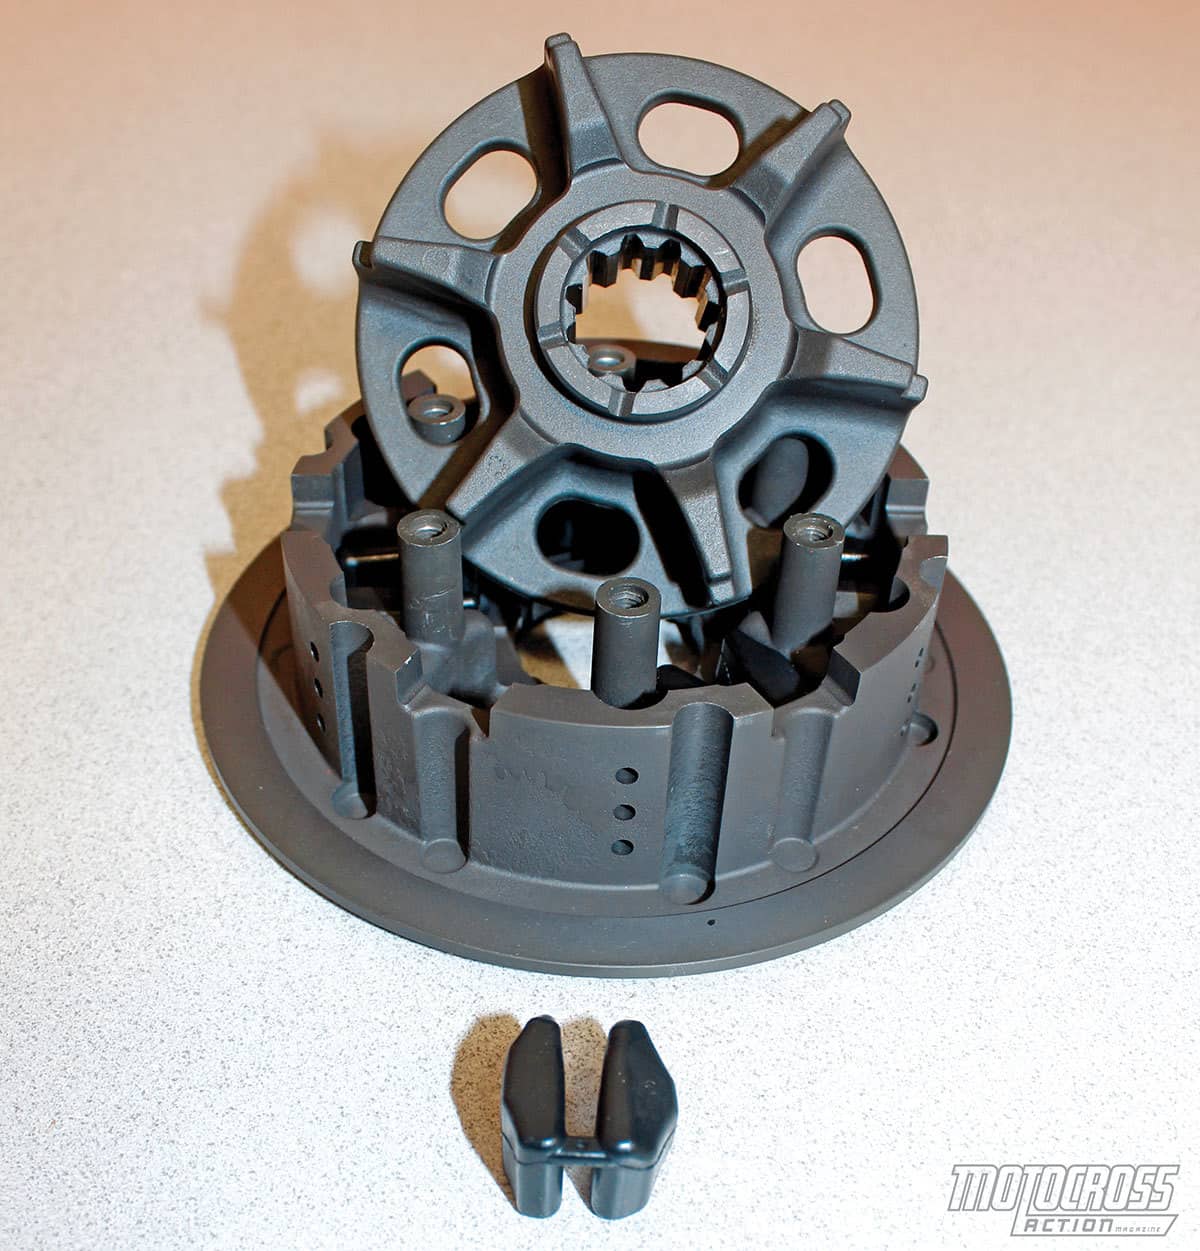
CLUTCH IDEAS
KTM’s Belleville washer-operated diaphragm clutch is a thing of beauty. It lasts twice as long as any Japanese clutch, self-adjusts, and rarely needs new plates; however, we do two things to help our 450SXF clutches. (1) We change the cush-hub rubber bumpers every four months. These rubber bumpers take the shock loads out of the clutch when the rear wheel is jolted in whoops, in jump landings or by errant shifts. (2) Given that the KTM 450SXF clutch has a one-piece CNC-machined steel basket, which no aftermarket company wants to try to duplicate, we do the next best thing and run a Hinson inner hub and pressure plate (along with a stiffer Hinson Belleville washer). The Hinson parts tighten up the actuation and provide more bite under drive.
BRAKE-PEDAL SPRING
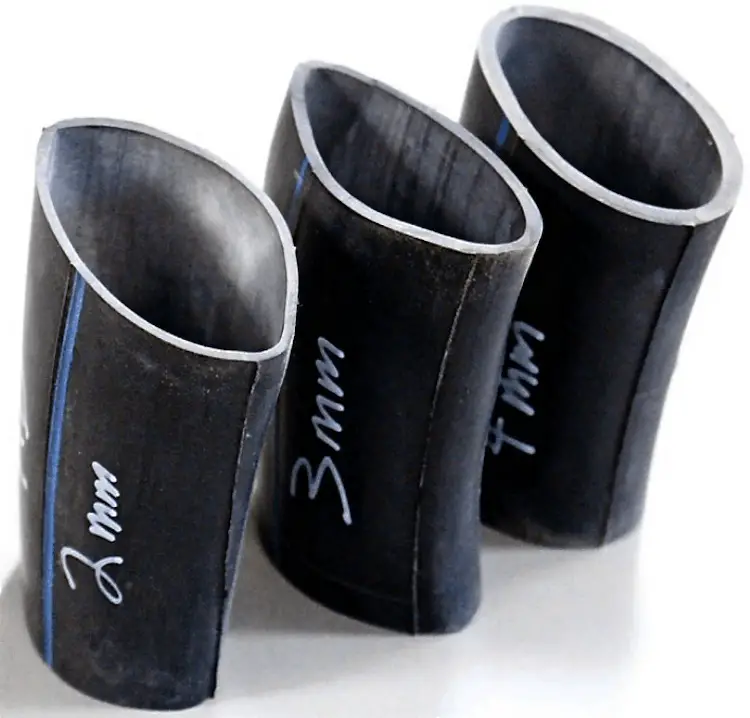
Turn your rear brake pedal spring around so that the tang on the spring closest to your foot faces inward. If it faces outward, you can hit it with your boot and unhook the spring. If you’ve ever had a KTM brake-pedal spring disappear, it is because the spring was on upside down. We also crimp the tangs once they are turned around to make them fit tight to the pedal. The MXA wrecking crew has broken a lot of KTM rear brake-pedal springs. To avoid this problem, we run brake-pedal springs with rubber sleeves over the coils. It is easy to do. Take a section of clear gas line. Cut it to the length of the brake spring’s coils. Heat it with a torch and slide it over the spring. We don’t know if this is the ultimate solution, but we haven’t broken any brake-pedal springs since encasing them in rubber.
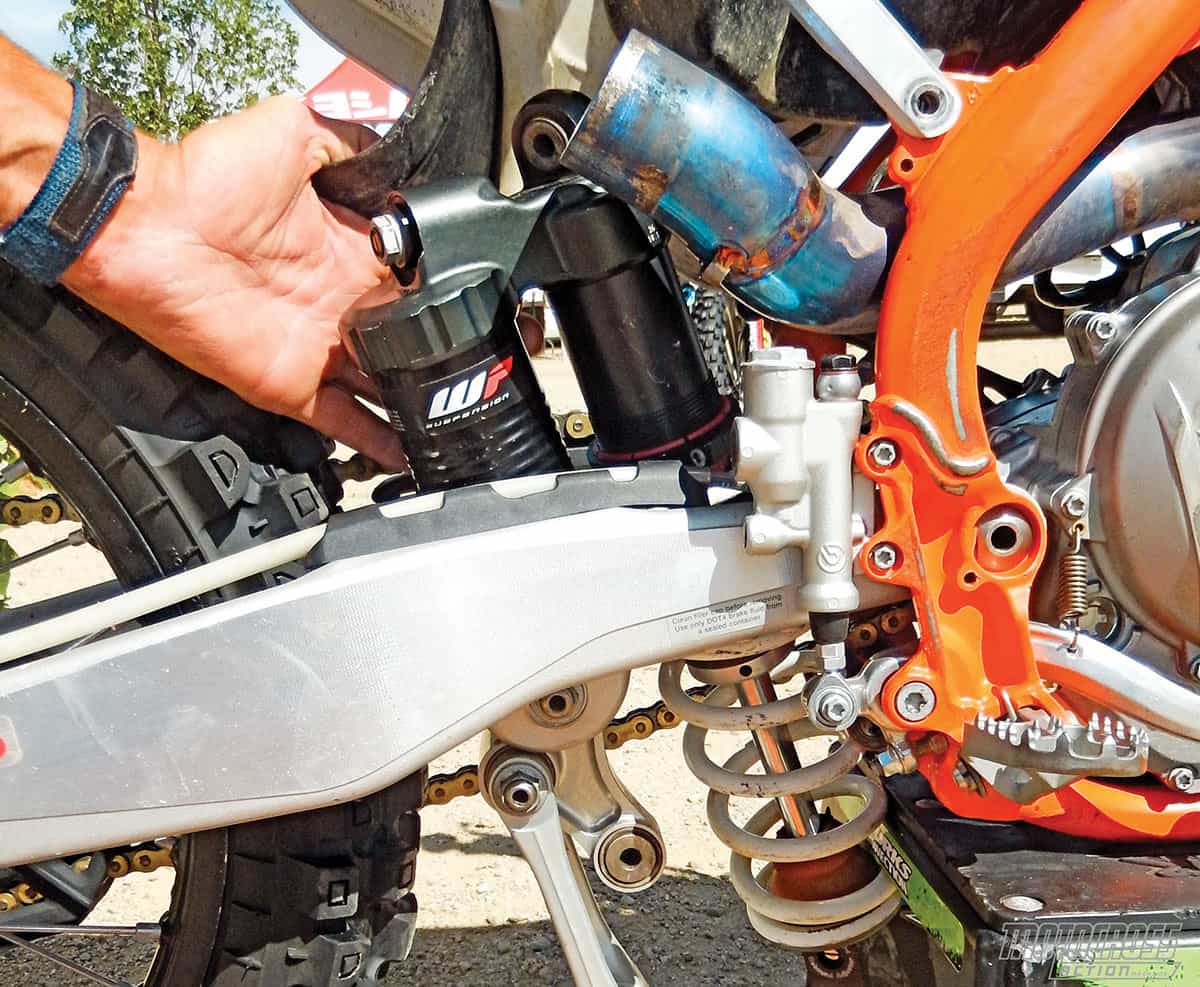
HOW TO REMOVE THE STOCK EXHAUST PIPE
Believe it or not, you can’t remove the exhaust pipe until you remove the rear shock. This is a major hassle because the KTM shock is not the easiest part to remove from the bike. There is a trick to doing this. (1) We swing the shock linkage rearward by removing the bolts on the front of the link arm. (2) Then, we drop the shock down through the opening in the swingarm as far as it will go before the piggyback reservoir hits. (3) Once the shock is moved down, we rotate it clockwise and pull it out through the rubber mud flap. It helps to have a friend raise and lower the swingarm as you do this, plus it takes some muscle. Luckily, aftermarket pipes don’t need to have the shock removed because they come with a slip-fit in the mid-pipe.
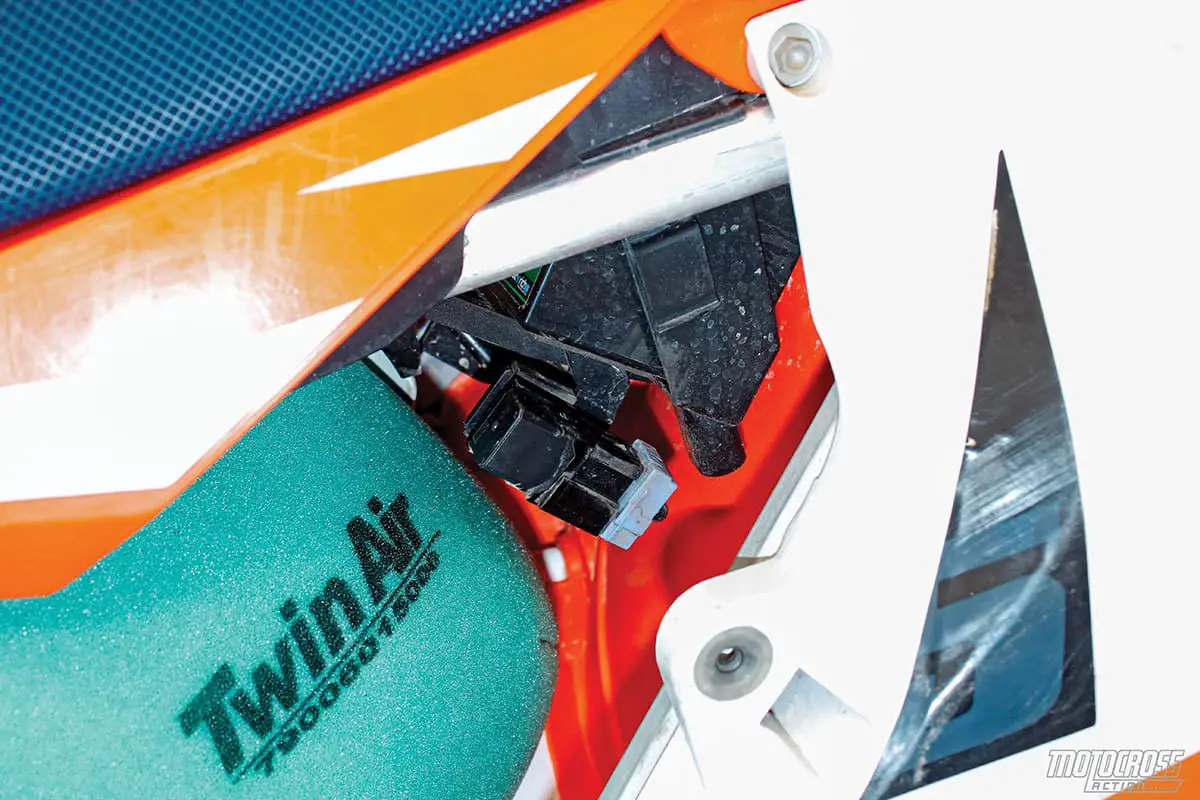
FUEL-PUMP RELAY
Inside the airbox is a black electric fitting. It is the fuel-pump relay. The relay slip-fits onto a tang inside the airbox with a rubber strap, but because it slides on from the bottom up, it can fall off. If it falls off, it will rattle around and, in the worst-case scenario, crack. Always check to make sure the fuel-pump relay is securely mounted.
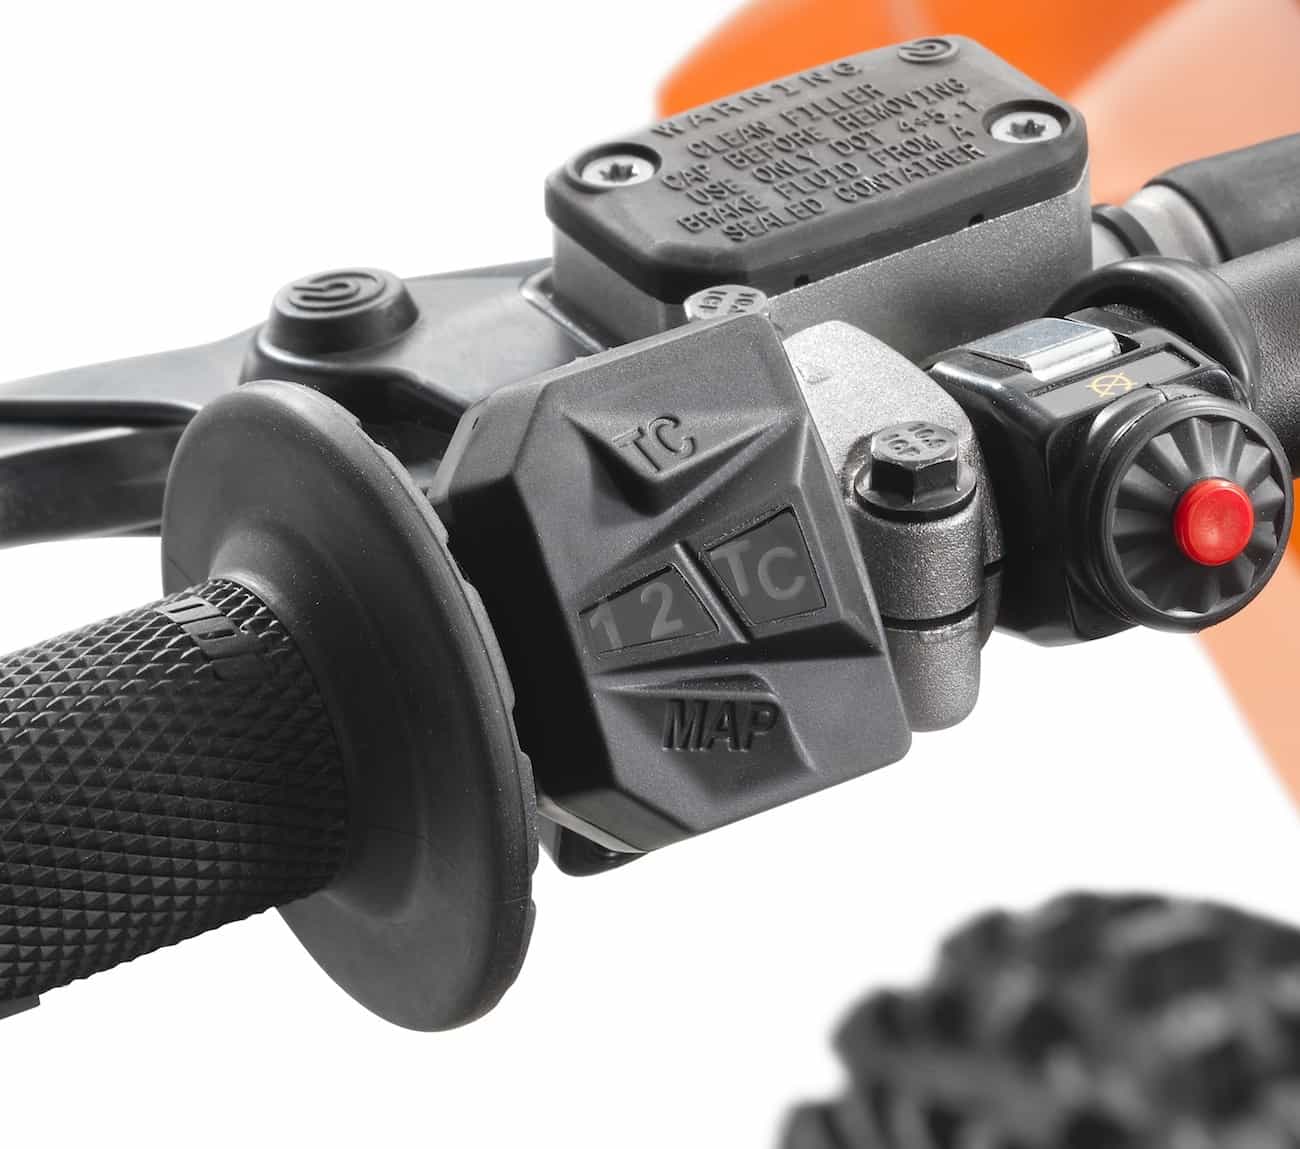
LAUNCH CONTROL TRICKS
When launch control is engaged, the EFI light, behind the front number plate, will flash rapidly. Be forewarned; launch control will only stay engaged for three minutes or until you rev the engine and then let the rpm fall off 30 percent or more. What does that mean? If you engage launch control on the starting line and then blip the throttle or do a burn-out, you will no longer be in launch control. And, you have to turn the bike off to re-engage launch control. The best strategy is to do all your blipping and burning out well before the start and then press the Map button and Traction Control button at the same time to activate launch control. Once you begin to rev up the engine, be careful not to let the rpm fall off. If you do, you will revert back to whatever map you originally chose. KTM’s launch control is at its best on concrete or rock-hard dirt starts.
Launch control works best with a steady throttle, not by twisting the throttle when the gate drops. There are MXA test riders who engage KTM’s launch control and hold the throttle wide open before releasing the clutch. It takes practice to find the perfect throttle position for maximum acceleration. KTM’s launch control disengages as soon as you chop the throttle for the first turn.
BUTTON MANAGEMENT
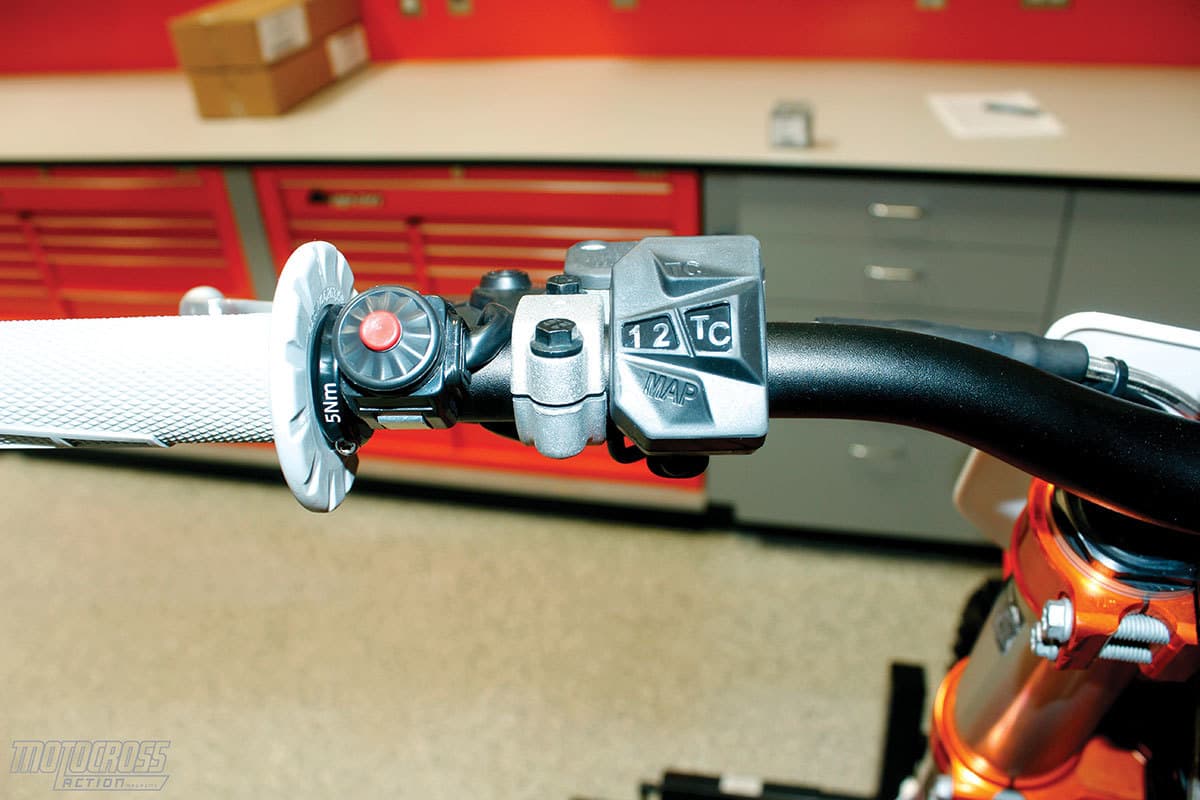
For some reason KTM puts the Map/Traction Control multi-switch next to the left grip with the kill button mounted inboard (on the inboard side of the clutch perch). MXA swaps the position of the kill button and multi-switch. This enables our thumb to hit the kill button without searching for it in an emergency. There is no emergency that would require us to have easy access to the multi-switch.
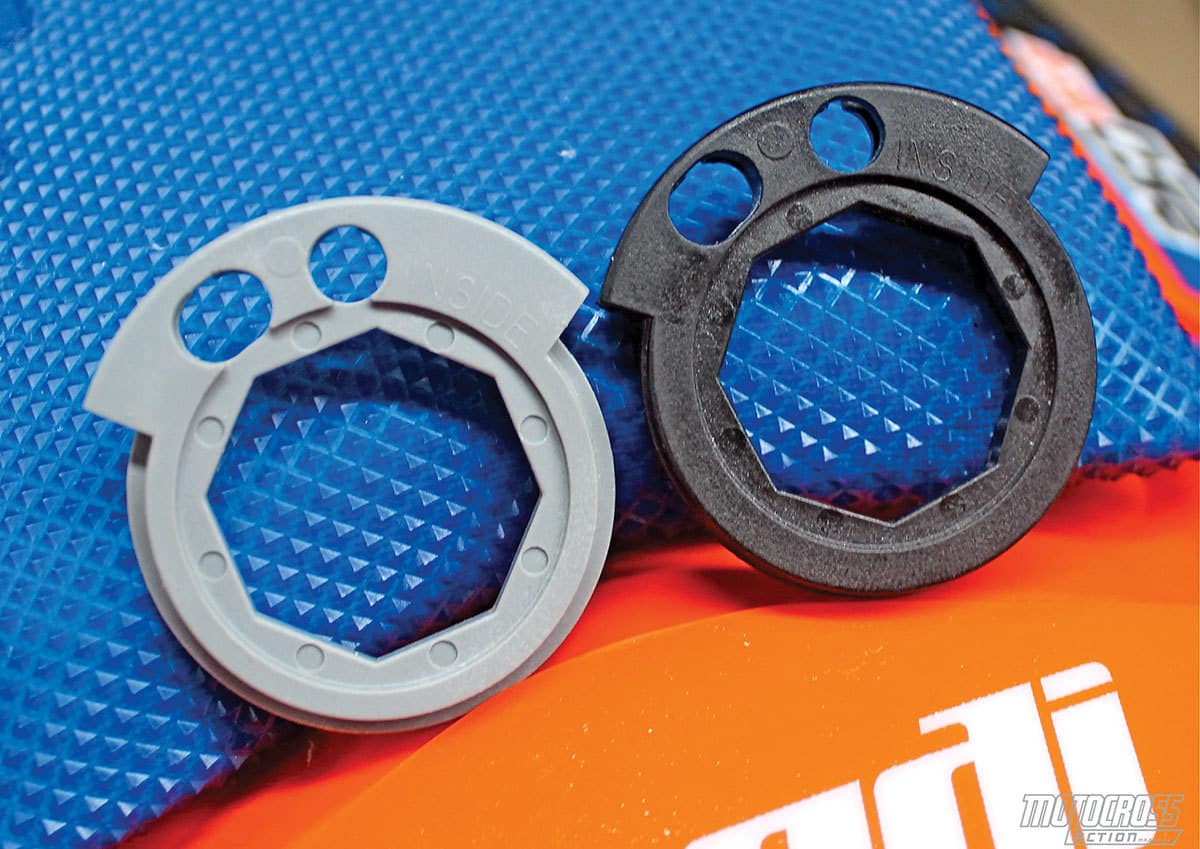
THROTTLE-CAM ROULETTE
Your KTM 450SXF comes with a spare throttle cam. KTM offers a black throttle-cam reel and a gray reel. On the 450SXF, the gray reel is installed at the factory while the black reel is in the parts briefcase. The outer diameter of each reel determines how much throttle cable is pulled per rotation. The larger the diameter of the reel, the less the rider has to twist the grip to open the throttle body’s butterfly all the way. The 39.5mm black reel is the quick-turn throttle. Conversely, the smaller 36.5mm gray reel opens slower for more controlled power delivery. Most MXA test riders prefer to run the black quick-turn reel in place of the stock gray reel in the 450SXF.

TEN THINGS TO WATCH
(1) Gas cap. It sticks. Take a body-building class; you’ll need it at some point.
(2) The exhaust. You can’t take the pipe off the bike without removing the shock. Not fun.
(3) Sprocket bolts. Watch them for as long as you own the bike. KTM claims that the sprocket bolts are prone to loosening if the chain is too tight. There is a chain-slack chart printed on the inside of the airbox cover. As a rule of thumb, when the chain looks too loose, that’s when it is correct.
(4) Spokes. Always check the spoke next to the rear rim lock. If it is loose, and five times out of 10 it will be, tighten all the spokes.
(5) Neutral. We love how well the KTM shifts from gear to gear but hate how hard it is to get it into neutral when standing still.
(6) Bike stand. When the bike is sitting on a bike stand, the front wheel is on the ground. This is a hassle when checking the spokes or working on the front end.
(7) Front brake hose. Be very careful when hooking tie-downs onto your handlebars that they don’t crimp the L-bend tube coming out of the front brake’s master cylinder. We would prefer more room between the brake line and the bars to lessen the chance of damage. Always use soft straps.

(8) Handlebar clamps. In 2016 the bars were mounted to a one-piece lower bar mount with two separate top bar-mount clamps. For 2017–’18 the bottom bar mounts are now two separate pieces while the top bar mount is one piece. From an engineering point of view, neither version works very well.
(9) Frame guards. Some test riders complained that their boots caught on the edge of the guards, while others think that the guards move their feet out too far. We removed them and replaced them with either Nihilo frame tape or nothing (except a can of touch-up paint).
(10) Shock collar. We hate this shock collar. Sometimes it works and sometimes it doesn’t. KTM warns against hitting it with a hammer and a punch, but we really want to hit it with something.
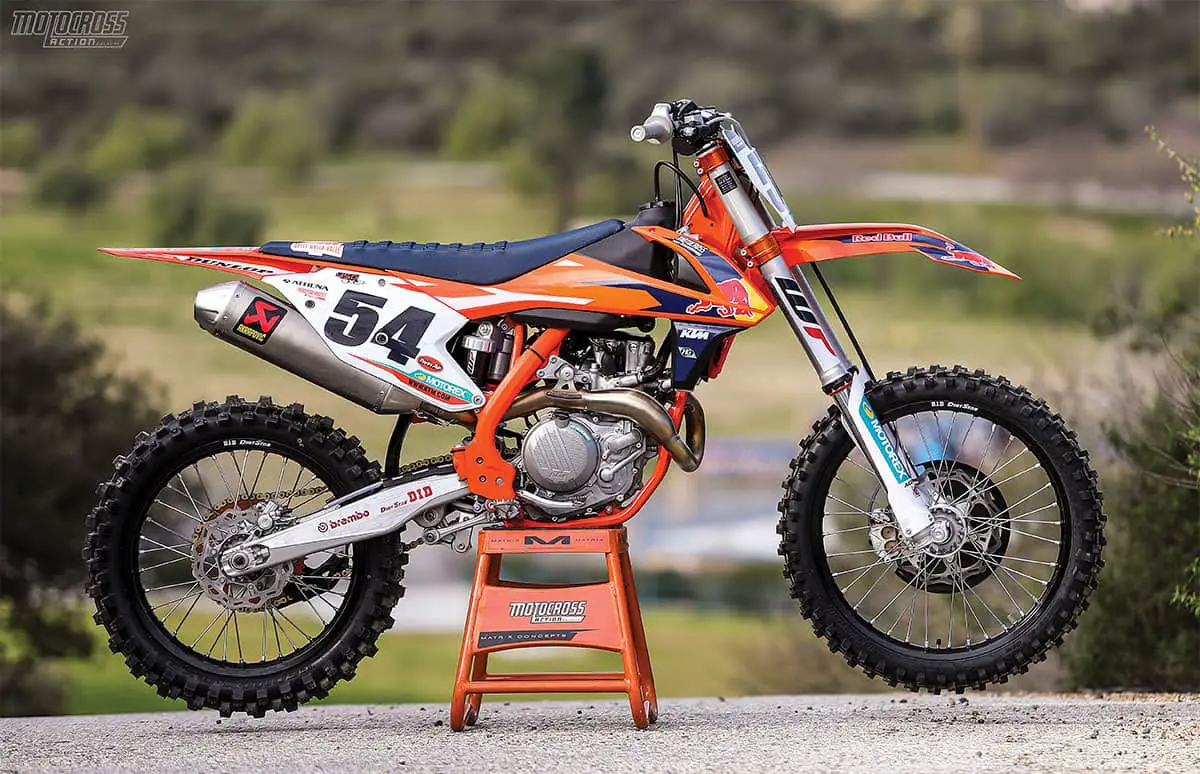
THE BURDEN OF WEIGHT
The 2017 KTM 450SXF hits the scale at 222 pounds and the 2018 weighs 223 (thanks to the larger battery and its new tray). That is a shockingly light number. The closest Japanese-built 450 is 9 pounds heavier and several are 16 or more pounds heavier. You could buy all the titanium in the world, but your bank account will run out of money before you get a 2017 Yamaha YZ450F, 2017 Suzuki RM-Z450 or an electric-start 2018 Honda CRF450 in the parking lot of the same ballpark.

TAKE CARE WITH THE FORK BLEEDERS
The fork-bleed screws on the 2017–’18 KTM 450SXF are a mismatched combination. The air side of the WP AER forks is bled with either a #20 Torx wrench or a 10mm T-handle. Even if you own a #20 Torx wrench, never use it on the aluminum air-bleed screw. Why not? It will strip out of the soft aluminum. Instead, use a 10mm T-handle. On the left non-air fork cap, you have to use the #20 Torx, but at least this screw is made from steel. On the left side we replaced the #20 Torx with the Phillips head screws from a previous-model KTM 4CS fork.
KTM 450SXF AER FORK SETTINGS
The trick to getting the most from your AER air forks is to find the proper air pressure for your weight, speed and track. We typically start with the OEM-recommended air pressure and then lower it in 2-psi increments. How do we know when we have the proper pressure? We lower the air pressure to the point where the forks are almost getting full travel. We don’t want them to bottom completely, but we also don’t want them to feel like they are dropping into their stroke. Typically, the AER forks ride high in their stroke with the stock air pressure.
Slower or lighter riders might have to lower the oil height in the damping leg by 10cc or more to get full travel. Additionally, the air pressure goes up as the ambient temperature rises. In these cases, just reset the air pressure to your chosen setting between motos. It should be noted that if you ride long motos, the air pressure will rise by 4 psi because of internal friction. We bleed the outer chambers regularly. Don’t be afraid to go down on the air pressure just because the manual says to run 156 psi. We use a zip-tie on the fork leg to see how much travel we are getting. We lower the air pressure until we have 1.5 inches of travel left to the zip-tie. We have riders who run as low as 135 psi. Once you find the right air pressure for you, use the clickers to dial in the feel.
Given an unlimited budget, most MXA test riders choose to run WP’s aftermarket Cone Valve forks. These are the equivalent of Showa A-Kit works forks. WP Cone Valve forks come in both AER air and coil spring versions. We prefer the spring models, but they weigh 3 pounds more.
For hardcore racing, we recommend this fork setup:
Spring rate: 135 psi (Novice), 145 psi (Intermediate), 150 psi (Expert)
Compression: 15 clicks out
Rebound: 15 clicks out
Fork-leg height: Third line
KTM 450SXF WP SHOCK SETTINGS
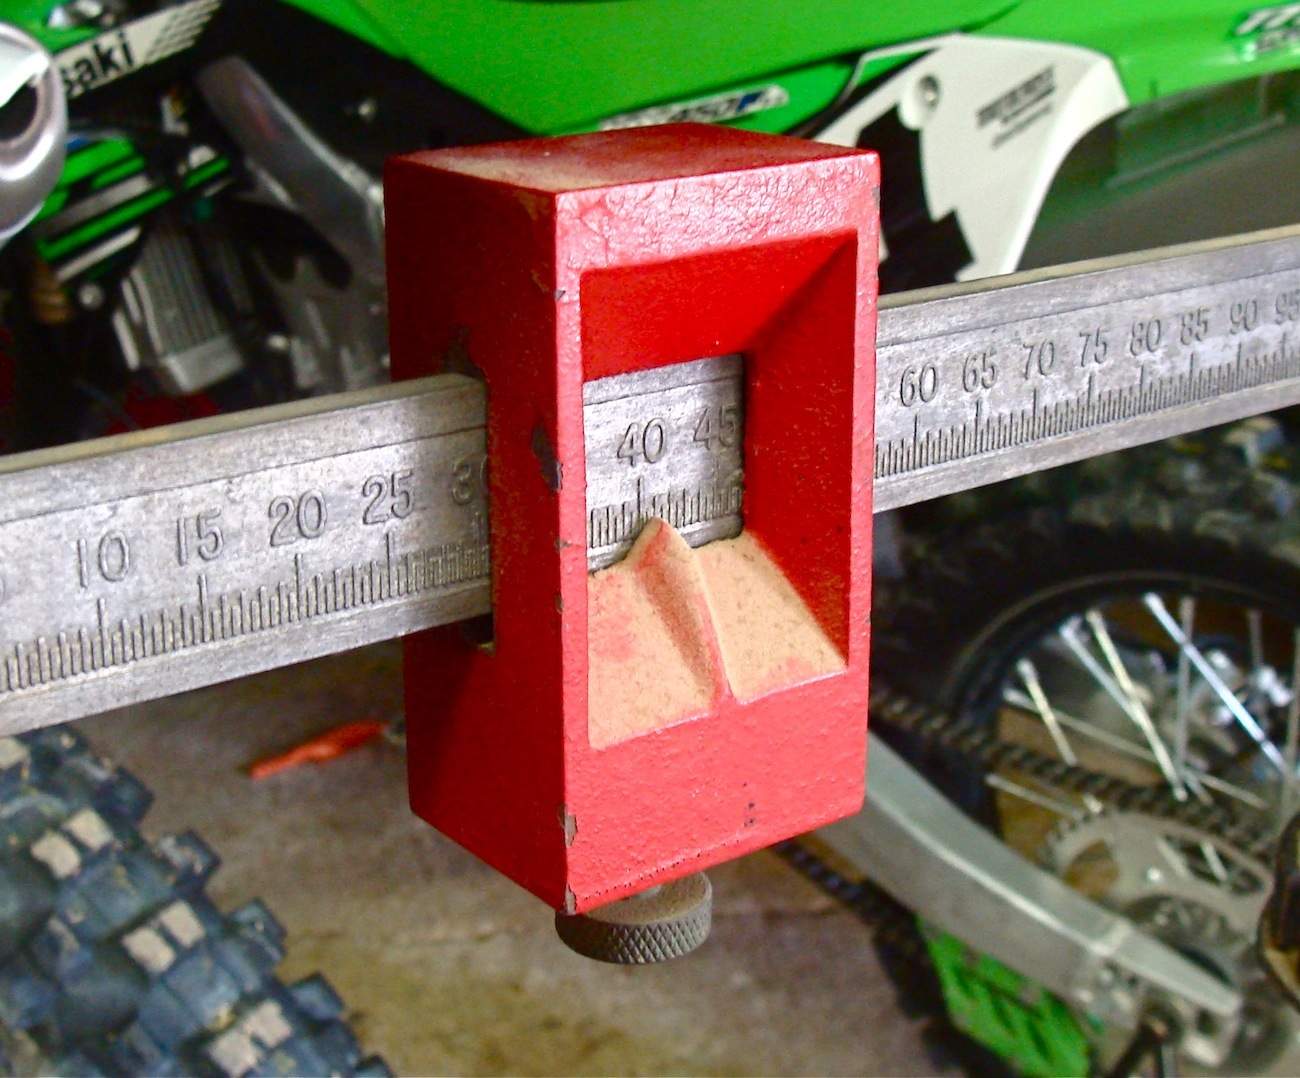
The 2017–’18 KTM 450SXF comes with a 45 N/m shock spring. This is a big improvement over the 48 N/m shock spring from 2016; however, shock springs come in different spring rates to meet the weight, speed and track demands of individual riders. Thus, if you are heavier than 190 pounds or faster than the average rider, you might be a candidate for the 48 N/m spring.
We turn the high-speed compression damping in a little to lessen G-outs and run more rebound than the recommended setting. Additionally, we set the sag at 105mm instead of the WP-recommended 110mm. We run the low-speed compression at 15 out, the high-speed compression at 1-3/4 turns out and the rebound on 10. When we have issues, we start with the high-speed adjuster first and then move to the low-speed clicker.
When we need to adjust the preload on the rear shock, we do not hit the red Nylon shock collar with a hammer. Instead, we turn the shock spring by hand while using a long flat-bladed screwdriver to pry against the frame and the shock collar at the same time. If you hit the nylon shock collar with a hammer and punch, you will deform the notches.
For hardcore racing, we recommend this shock setup for the 2017 KTM 450SXF (stock specs are in parentheses):
Spring rate: 45 N/m
Race sag: 105mm (110mm)
Hi-compression: 1-3/4 turns out (2 turns out)
Lo-compression: 15 clicks out
Rebound: 10 clicks out (15 clicks out)

Comments are closed.