HOW TO REPROGRAM YOUR KX450F FUEL INJECTION SYSTEM IN 17 EASY STEPS:

In adddition to the $500 calibration kit, you willneed a 12 volt battery and laptop PC.
Kawasaki has developed a tool that not only allows you to fine tune the rate of fuel and the ignition timing of your 2009 KX450F, but it lets you record and analyze the data, including nine different parameters. The MXA wrecking crew spent several weeks learning the capabilities of the Kawasaki tool.
(1) WHAT’S INCLUDED IN A KX FI CALIBRATION KIT? For $515, you get a controller bracket, ECU controller, power supply harness, controller sub-harness, USB cable, wire harness clamp, two controller bands, two lower/upper controller dampers, one controller damper and a software disk (including the ECU controller driver), a thorough instruction manual, a quick-reference sheet and sample settings.

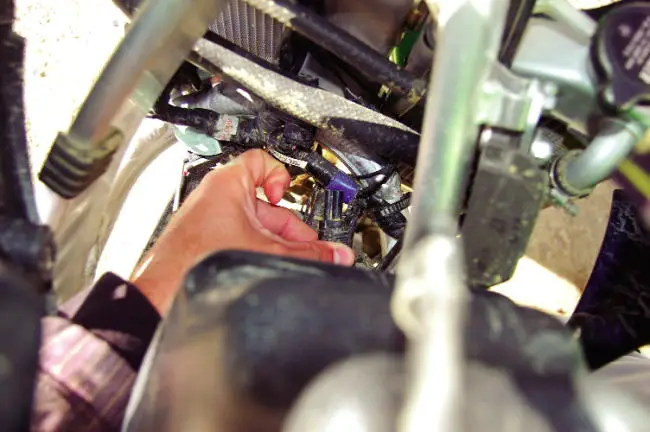
Find the four-holed socket to connect the ECU controllers’s sub-harness. Disregard the three-holed socket. It is used for dealer diagnostics.
(3) HOW DO YOU INSTALL THE SOFTWARE? The first thing to do when you receive your Kawasaki kit is to insert the CD-ROM and install the software and driver into your computer. Also, you need to open the manual and use it for reference while you install and learn to use the Calibration Kit. MXA is only giving you an overview. The manual contains more in-depth detail and illustrations.
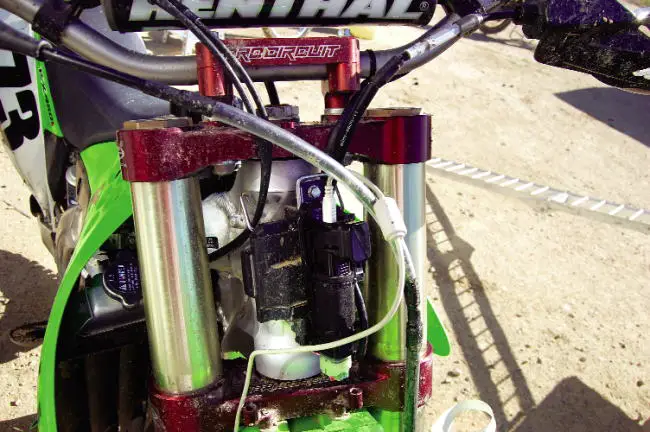
(4) HOW LONG DOES IT TAKE TO MAKE SETTING CHANGES? Once installed, the ECU controller can remain on the bike (nestled behind the front number plate), allowing for quick and easy access, connection and setting changes. This is a big plus over the CRF450 controller that requires you to remove the gas tank for each ignition change. The initial Kawasaki installation takes about 20 minutes, but after that, setting changes and data downloads can be done in just a couple of minutes.

The ECU controller is equipped with pads and bracket, and is tucked safely behind the front number plate. As long as its lid is properly secured, it’s safe from the elements.
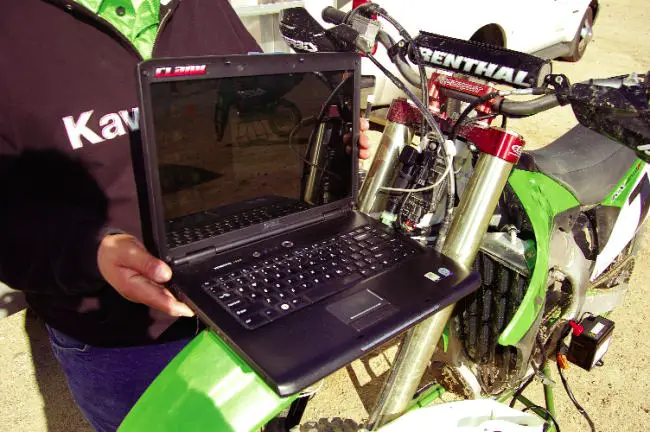
(6) HOW DO YOU CONNECT YOUR COMPUTER TO THE BIKE? Remove the front number plate and lift the cap of the ECU controller to expose the plug for the USB cable. Connect your computer via USB. Disconnect the green plug behind the left radiator and reconnect it to the battery. The first time you connect your computer to the ECU controller, you must complete the vehicle recognition process. To do this, click “Start Communication” under “Configuration” from the Startup menu, then click to prompt the vehicle recognition process. This only needs to be done again if you change to a different bike.
(7) WHAT’S THE BEST WAY TO USE THE PROGRAM? There are many different functions in the program, and many different ways to do the same thing. For example, “Reset ECU” is under the “Configuration” menu. It is also possible to reset the ECU with a different button at the top of the screen or by hitting the F6 button. Play with the program (it doesn’t necessarily have to be connected to the bike) to learn how you prefer to use it.
Notice the “Edit Data” versus “ECU Data” tabs. These let you quickly edit the changes you want to make and compare them to the setting on the bike. You can “Apply” the Edit Data of your ignition and fuel injection windows individually or click “Multi Function Setting” under the “Configuration” menu. Once you apply your setting to the bike, the data in the two tabs will match.

Changing EFI settings can be done quickly by connecting the battery, unbolting the number plate and plugging in your computer.
(9) WHAT PRESET IGNITION MAPS AND FUEL SETTINGS ARE THERE? The “Setting Data Samples” include Beginner, Soft Riding Surface, Hard Riding Surface, Advanced, Retarded, Leaner Fuel Setting and Richer Fuel Setting. Open them by clicking “Open” under the “File” menu. It’s a good idea to save the sample settings on your computer so you don’t always have to use the CD. You’ll need to create a folder to store your personally created settings anyway. To go back to stock, click the “Reset ECU” under “Configuration.”
(10) HOW WELL DO THE PRESETS WORK? On the track, the most noticeable difference in the various ignition-based settings is how abruptly the power comes on. Our favorite settings were the “soft” and “hard” surface settings. The soft surface setting makes the power hit harder. It has the quickness to get on top of soft terrain and the hit to make the bike respond when you get on the gas in deep turns. The “hard” surface setting is much more forgiving of movements of your right wrist, facilitating throttle control in low-traction situations. The “hard” surface setting also made the bike easier to ride after fatigue started to set in.
(11) HOW DO YOU MAKE YOUR OWN SETTING? We have found that it’s helpful to use one or more of the presets as a starting point and then make incremental changes by changing the values in the table. The graphs are a great way to visualize changes, but we don’t recommend designing your own maps by dragging around portions of the graph. The “table method” is far more precise. You can even fine tune the throttle position and rpm at which you make changes (by clicking “Map Point Setting” under the “View” menu). Be sure to save your setting under a different name so you don’t replace the sample setting on your computer.

(13) WHAT PARAMETERS WILL IT RECORD?
There are eight recorded parameters: Engine rpm, degree of throttle opening, manifold absolute pressure, engine coolant temperature, air temperature, intake air temperature, ignition offset and fuel injection offset.
(14) HOW DO YOU VIEW THE RECORDED DATA? Reconnect your computer and click “Download Logging Data” under the File menu and name and save it. Click “Open” under the “File” menu to open any data that you have previously saved.

(16) HOW DOES KAWASAKI’S CALIBRATION EQUIPMENT COMPARE TO HONDA’S AND SUZUKI’S? Honda offers a somewhat similar program and tool. Suzuki doesn’t offer one, but Yoshimura makes a handheld tool for the RM-Z. Kawasaki’s kit is by far the most developed. It’s the quickest to use.
(17) WHAT DO WE REALLY THINK? Kawasaki’s KX FI Calibration Kit offers an impressive level of control and usability in adjusting fuel and ignition and recording and analyzing data on the KX450F. Realistically, the Kawasaki Calibration Kit gives a level of
scrutiny that is beyond what an average rider can really utilize. The average guy can, however, have a lot of fun tinkering, designing curves, fine tuning settings, analyzing data and learning all the ins and outs of the program. For someone who is really serious about his racing, the calibration kit is a high-tech tool that makes dropping a clip position on the needle seem archaic. Kawasaki’s KX FI Calibration Kit takes tinkering to a whole new level.


Comments are closed.