MXA WRENCH TECH: HOW TO REPLACE GRIPS WITH RENTHAL’S BRAD CAMERON
There are many homegrown methods of installing new grips, such as spray paint or electrical tape, but Renthal’s Brad Cameron recommends using grip glue. Brad says it is important to pair the proper grip glue with the right grips. Other brands of glue may react with the rubber compound in the Renthal grips and destroy the grip.
| TOOLS REQUIRED: ? Hammer ? Safety wire ? Lint-free rag ? Side cutters ? Razor blade ? Contact cleaner ? Safety wire pliers |
WHAT YOU NEED TO BUY: ? Grip glue ? New grips TIME TO COMPLETE: |
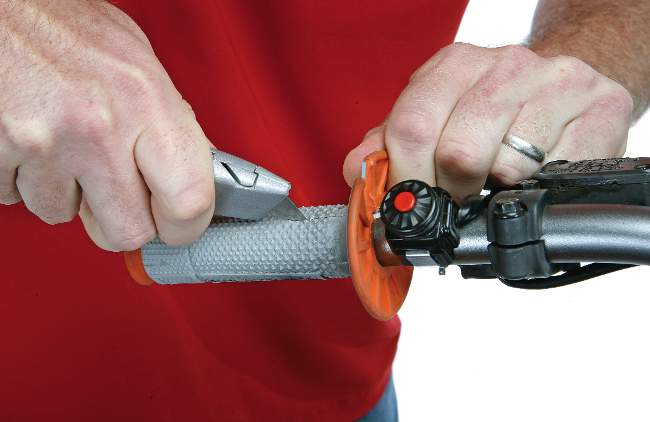
STEP 1
With the bike on the stand, carefully cut the safety wire off both grips using dykes (if safety wire was used). Remove the old grips by twisting and pulling on each grip. Or, carefully cut the grips off by running a razor blade down the length of each grip. Do not cut or scratch the surface of the handlebar or throttle tube when removing the grips. KX-F and RM-Z owners: You may want to buy an aftermarket aluminum throttle tube since the stock grip is vulcanized to the tube, making it nearly impossible to remove.
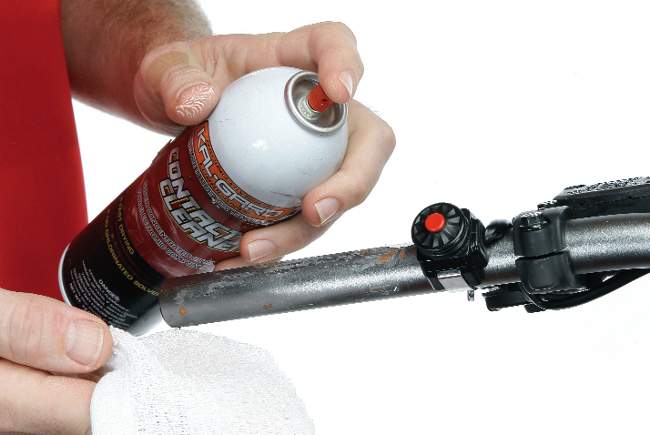
STEP 2
Clean the handlebar (clutch side) and throttle tube with a spray solvent, such as contact cleaner, to remove any residual glue or contaminants. Wipe the sprayed areas off with a lint-free rag. Make sure that the cleaned areas are dry and free of debris.

STEP 3
Apply three small beads of grip glue on the length of the grip area (clutch side). Coat the inside of the clutch-side grip (the thicker grip) with grip glue. Don’t use too much glue, as it will ooze out during installation and make a mess. Squeeze the grip to spread the glue around the interior of the grip.

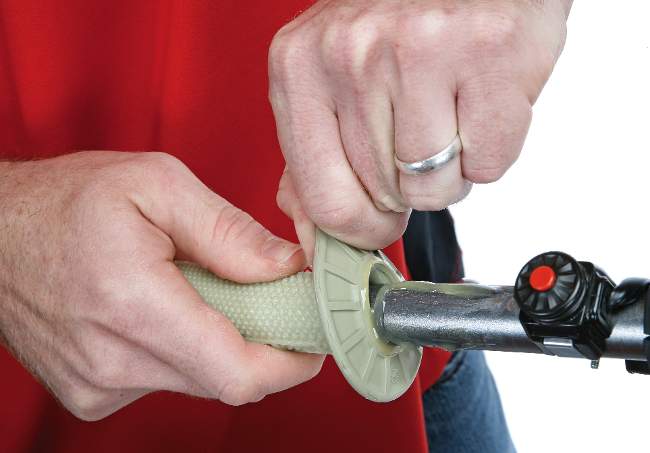
STEP 4
Slide the grip down the handlebar and into position. While doing so, pull the lip of the grip upwards to allow air to escape. This will prevent any pockets of air from getting trapped in the grip. Once the grip is all the way on, give it a 360-degree spin to distribute the glue evenly. Place the grip in your preferred position. Clean off any excess grip glue from the end of the grip flange.
STEP 5
If the throttle tube has an open hole at the end of the housing, cut a sticker into a circle and place it over the hole. Otherwise, grip glue could penetrate the hole and stop the throttle tube from spinning freely. Using the same gluing techniques as on the clutch side, apply three small beads of grip glue to the length of the grip area. Coat the inside of the throttle-side grip (the thinner grip) with grip glue. Remember, don’t use too much glue. Squeeze the grip to spread the glue around the interior of the grip.
STEP 6
Carefully slide the grip down the length of the throttle tube. Remember to pull the lip of the grip upwards to allow air to escape. Once the grip is on, give it a spin to distribute the glue evenly. Slide the grip to the preferred riding position. Clean off any excess grip glue from the end of the grip flange.
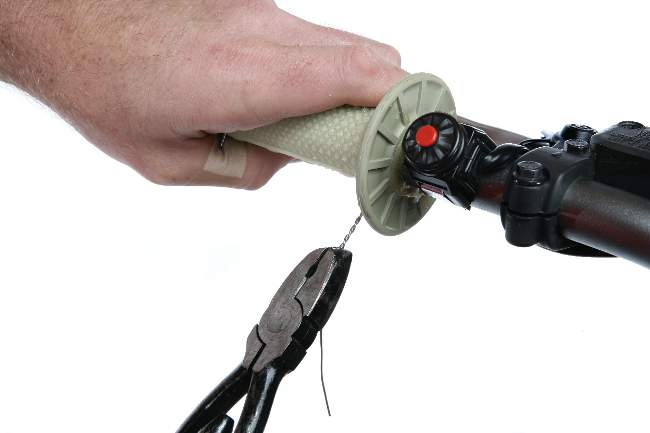
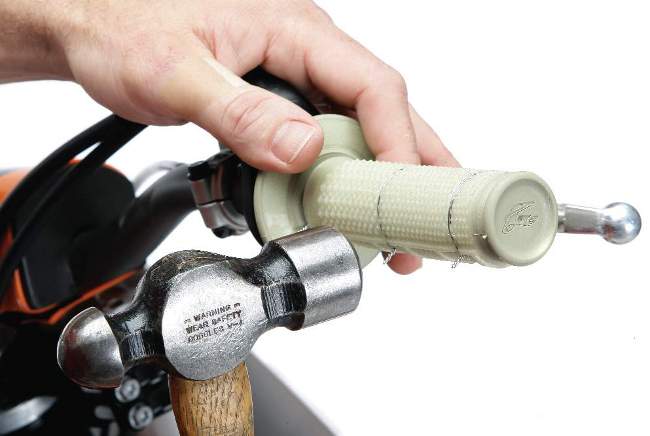
STEP 7
Cut a 9-inch piece of safety wire and wrap it around the grip twice near the clutch-side grip flange. Using the safety wire pliers, carefully twist the wire at the bottom of the grip until it is taut. Do not over-tighten the wire or it will cut through the grip. Unclasp the pliers from the safety wire and cut the loose wire, leaving approximately 1/4 to 3/8 inches of excess wire. Using a hammer, tap the excess wire flush against the grip to prevent contact with your hands.
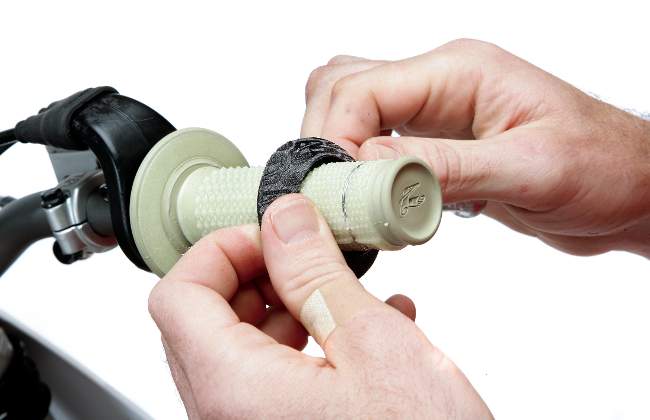
STEP 8
Follow this same procedure down the remainder of the grip, ending with three evenly spaced strips of safety wire on the grip. Continue on with the throttle-side grip, using three strips of safety wire.
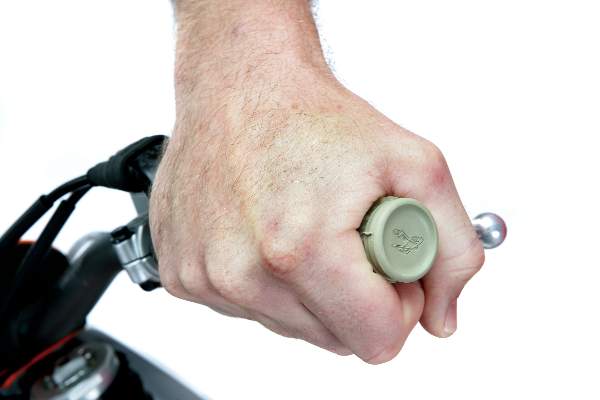
STEP 9
Install grip donuts, if you so choose. Once the grips have been safety wired and glued, let the glue dry for at least eight hours before riding.


Comments are closed.