HOW TO LOWER FORK OIL HEIGHT (WITHOUT TAKING YOUR FORKS APART)
Removing fork oil is an effective, simple and free modification. The MXA wrecking crew often lowers the fork oil height in our test bikes to improve suspension performance. Do not be intimidated by the thought of adjusting the oil height in your forks. If you extract too much oil, simply use a fork oil syringe tool (www.j6shocks.com) to add oil. Finally, removing fork oil is a process that works best with a friend’s assistance, but it can be done alone — if done carefully.
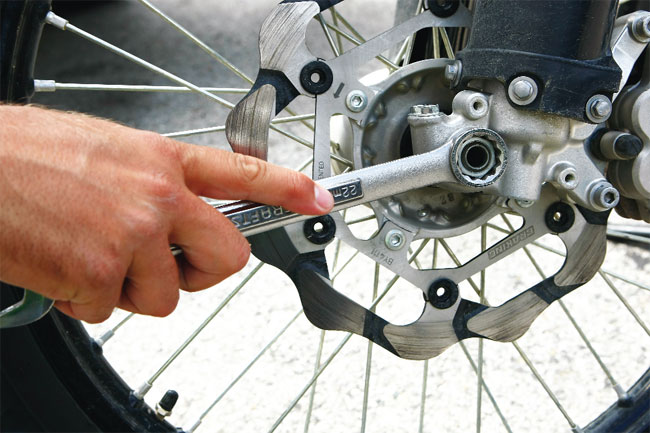
STEP 1
With the bike clean and firmly positioned on a stand, remove the front axle nut with the correct open-ended wrench. Loosen the axle pinch bolts with the appropriate open-ended wrench to the point where the front axle can easily be pushed out of the front wheel. Use a hex axle tool to completely remove the front axle. Pull the front wheel assembly away from the front brake caliper and fork lugs. Set the wheel, axle and spacers aside.
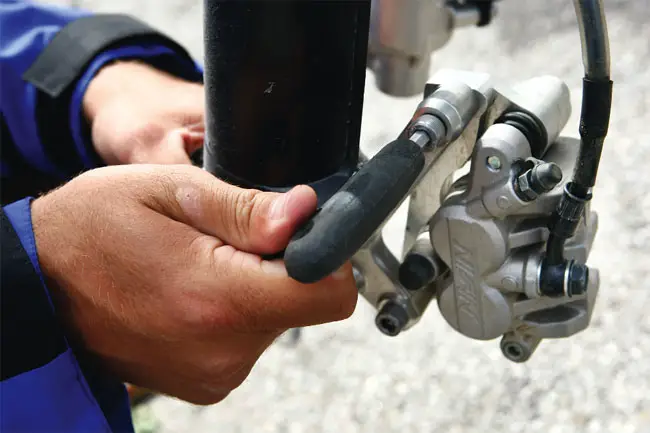
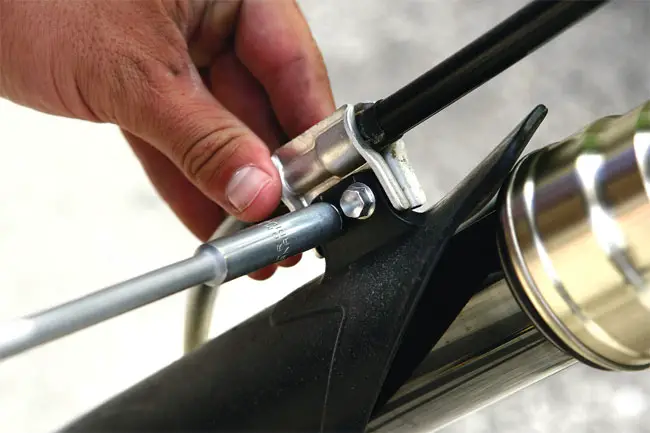
STEP 2
Use the appropriate wrench (Allen or 10mm open-ended wrench) to remove the front brake caliper from the left-side fork leg. Note the routing of the front brake line. Using the proper wrench, loosen the front brake line pinch bolts on the left fork guard to the point where the brake line can be separated from the housing. It is not necessary to completely remove the pinch bolts and housing. It’s also unnecessary to remove the fork guards at any point during the process.
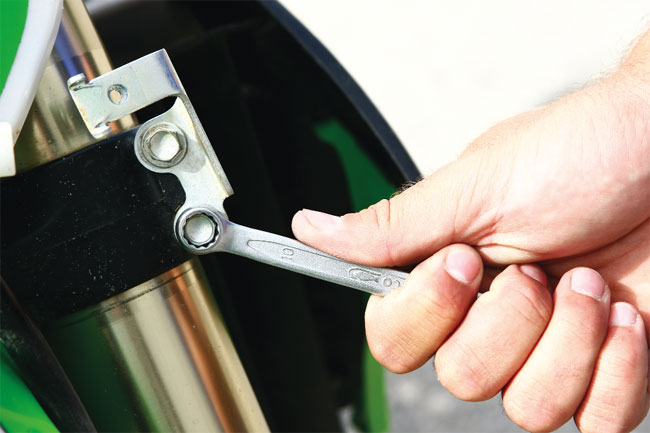
STEP 3
Take note of the fork-leg height position above the triple clamps. Using the proper wrench (10mm box-end wrench on most bikes), carefully loosen both pinch bolts on the lower left-side triple clamp. Holding the left fork leg with your left hand, slowly loosen the upper left-side triple clamp pinch bolts. The fork leg should slide down and out of the triple clamp housing. If the fork leg refuses to move, continue to loosen the pinch bolts. If the fork leg still doesn’t budge, carefully use a straight-blade screwdriver to open the triple-clamp pinch gap. Make sure that the fork leg doesn’t fall and slam onto the ground. This should be prevented by holding onto the fork leg with your left hand. Set a cubic centimeter measuring cup on a clean and flat surface, such as a work bench.

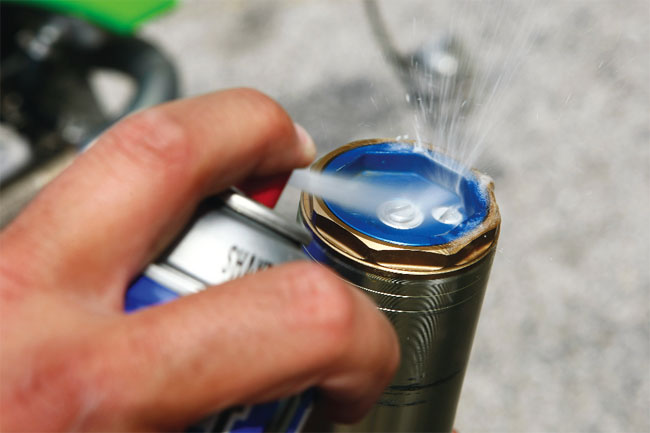
STEP 4
Using contact cleaner and a lint-free rag, clean the fork-leg cap (particularly around the air bleed screw), making sure to remove any dirt or debris. Locate the air bleed screw on the top of the left fork leg. Slowly loosen and remove the air bleed screw with the correct screwdriver, making sure that the rubber O-ring stays attached to the bleed screw. Set the air bleed screw to the side in a safe place. Be careful not to knock any dirt into the air bleed hole.
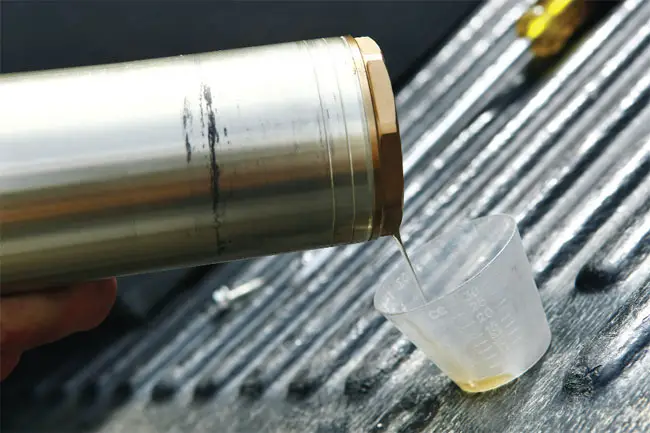
STEP 5
Carefully tip the left fork leg at a 45-degree angle with the air bleed screw hole aimed directly into the cubic centimeter measuring cup. This step is easiest with the help of a friend. Slowly compress the base of the fork leg with your right hand, holding the fork-leg tube firmly with your left hand. Continue to pump the fork leg until fork oil begins to exit the air bleed screw hole. Follow this procedure until you have reached the desired amount of extracted fork oil (we recommend removing fork oil in 5cc increments). If too much oil has been removed, tip the fork leg right-side up and, using a fork syringe tool, draw fork oil into the syringe and slowly compress it back into the air bleed screw hole.
STEP 6
Once the desired amount of fork oil has been removed from the left-side fork leg, turn the fork leg right-side up so that the air bleed screw hole is facing you. Using a lint-free rag, clean any excess oil off the top of the fork leg. With the appropriate screwdriver, tighten the air bleed screw, making sure that the rubber O-ring is in place. Using contact cleaner and a lint-free rag, make sure that the fork cap, as well as the fork leg itself, is clean and oil-free.

STEP 7
Carefully slide the left fork leg back into the triple clamp, making sure that the fork leg is set to the desired height above the top triple clamp. Rotate the fork leg until the air bleed screw is facing toward the front of the bike. Using a torque wrench, tighten the top triple-clamp pinch bolts to the appropriate setting found in your owner’s manual; only then should you tighten the bottom triple-clamp pinch bolts to the recommended torque specifications.
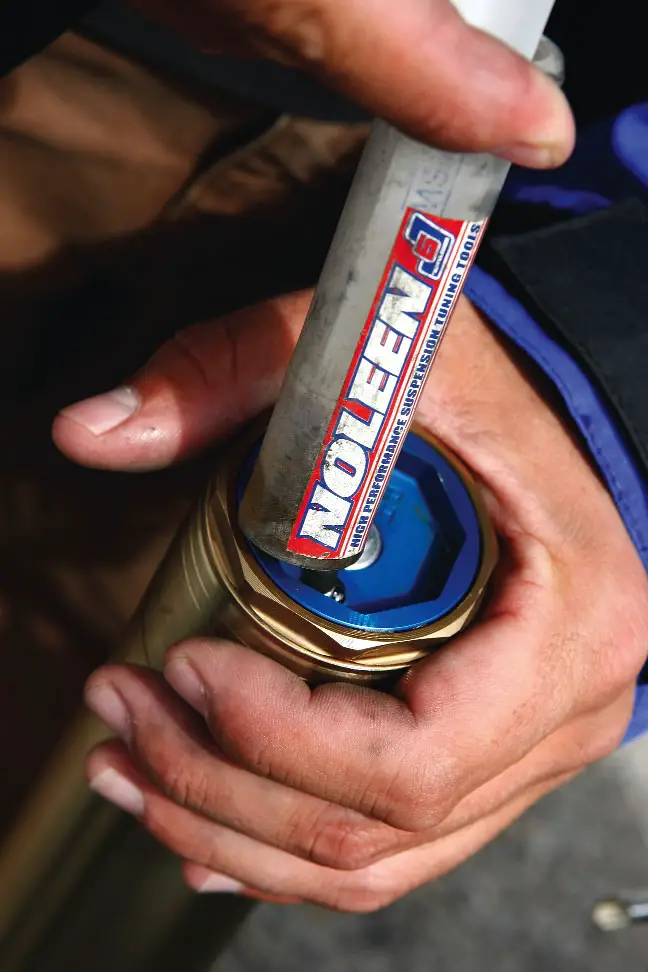
STEP 8
With the left fork leg properly installed, follow the same procedures in steps three through seven to properly remove the right fork leg. Make sure that the fork cap is clean and debris-free. Drain the exact amount of fork oil out of the right fork that was removed from the left fork leg. Again, if too much fork oil was removed, use a syringe (shown above) to insert the correct amount of fluid back into the fork leg. Tighten the triple-clamp pinch bolts to the suggested setting found in your owner’s manual.
STEP 9
With both fork legs installed on the bike, properly route the front brake line through the fork guard brake housing and down to the left fork leg. Tighten the front brake caliper bolts with the appropriate wrench to the proper torque setting. Snug down the brake line pinch bolts, making sure that the brake line is in the proper location.

STEP 10
Make sure that the front axle is greased and free of dirt or debris. Place the wheel spacers firmly in the front wheel and line up the wheel so that the front brake rotor properly fits into the front brake caliper. Slide the front axle through the right fork lug hole, right wheel spacer, hub, left wheel spacer and left fork lug hole. Thread the axle nut to the axle and tighten with the appropriate wrench until the axle spins and seats into the fork leg. Spin the front wheel and slam the front brake lever several times to ensure that the front wheel is properly aligned. Tighten the fork leg pinch bolts to the proper torque settings, and then tighten the front axle nut to the suggested torque specification.
NECESSARY ITEMS:
Lint-free rag
Axle grease
Contact cleaner
Fork oil syringe tool (optional)
Cubic centimeter measuring cup
8mm wrench (dependent on bike)
10mm wrench (dependent on bike)
Hex axle tool (www.motionpro.com)
Screwdriver (type dependent on bike)
Torque wrench (with appropriate sockets)
Open-ended wrench (size dependent on bike)
TIME TO COMPLETE: 25 minutes


Comments are closed.