MXA WRENCH TECH: HOW TO DIAL IN YOUR SHOCK IN 20 EASY STEPS

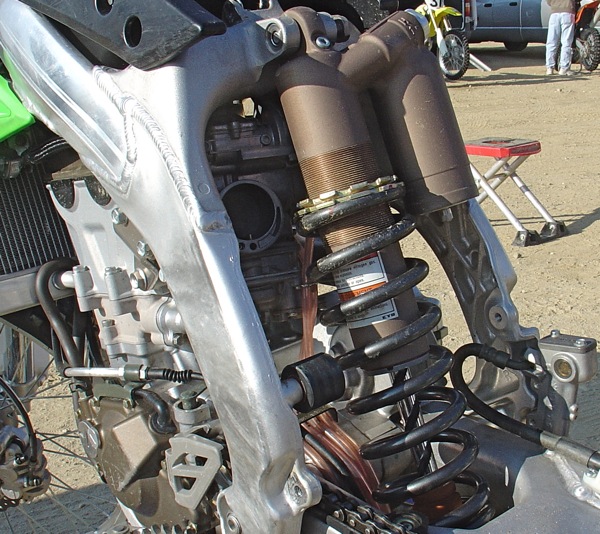
The best thing about a modern motocross bike’s shock absorber is that it is totally adjustable. The worst thing? It is totally adjustable. All those dials, clickers and knobs are useless without the knowledge of how to use them?and you probably don’t have it. Your shock may have 20 clicks of adjustment, but 19 of them are wrong. No worries, the guy next to you on the starting line doesn’t know what to do either. In fact, it is estimated that 75 percent of motocrossers don’t touch their shock’s adjusters, or they turn them the wrong way when they do.
Regardless of which type of shock technician you are, the MXA wrecking crew wants to give you the tools to make your shock work?whether you use them or not.
STEP ONE: LUCKILY IT ONLY GOES IN TWO DIRECTIONS
The shock on your bike only has two motions: up and down. It is crucial that you remember that up and down are distinct and separate actions (and should not be confused with each other). You don’t fix the up movement with the down adjuster or the down movement with the up one?not that thousands of riders haven’t tried.
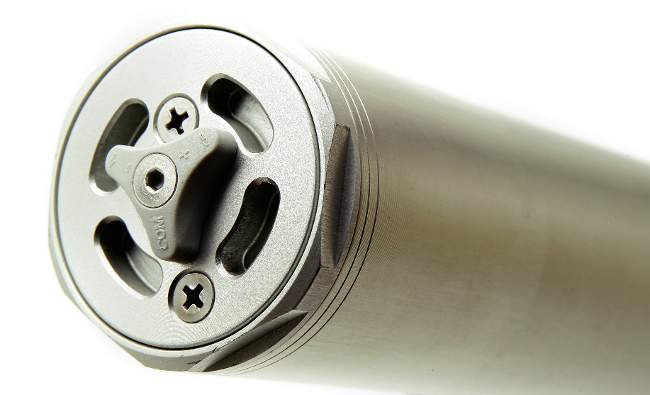
You can’t fix both ends at the same time. Focus on the shock first and then move to the forks. The fork’s compression adjuster is on the top.
STEP TWO: DOWN IS EASY TO UNDERSTAND
When the rear of the bike goes down, as when landing from a jump, it compresses the suspension; thus we call the down movement “compression.”
To slow down the shock so that it doesn’t bottom, the shock has something called “damping” (not dampening). Damping is specialized shock jargon that translates into “slow down.”
What does a shock use for damping? Oil. The shock is filled with oil. The oil is contained in chambers. As the oil is compressed (during compression), it is forced through orifices or around blockades that impede its flow from one chamber to the next?and the impediment slows the shock down.
Why does the shock slow down? For the same reason that you can’t push a fat pig through a small hole in the fence. The oil gets stuck in the hole.
STEP THREE: OIL ISN’T FREE FLOWING
Compression damping is the degree to which the downward motion of the shock is slowed by the obstructed oil. The shock slows because the pig (oil) is trying to squeeze through a very small hole.
STEP FOUR: FASTER, PUSSYCAT, FASTER
Damping can be either slow or fast, hard or soft, heavy or light. Slow, hard or heavy damping means that the flow of the oil through the orifices in the shock is impeded. Fast, soft or light damping means that the oil flows easily.
STEP FIVE: REBOUND IS COMPRESSION AND VICE VERSA
Rebound is the upward motion of the shock. Think of it this way: when your bike lands from a jump, it rebounds off the ground (like a basketball). To control the upward motion, oil is squeezed through another set of holes (only in the opposite direction).
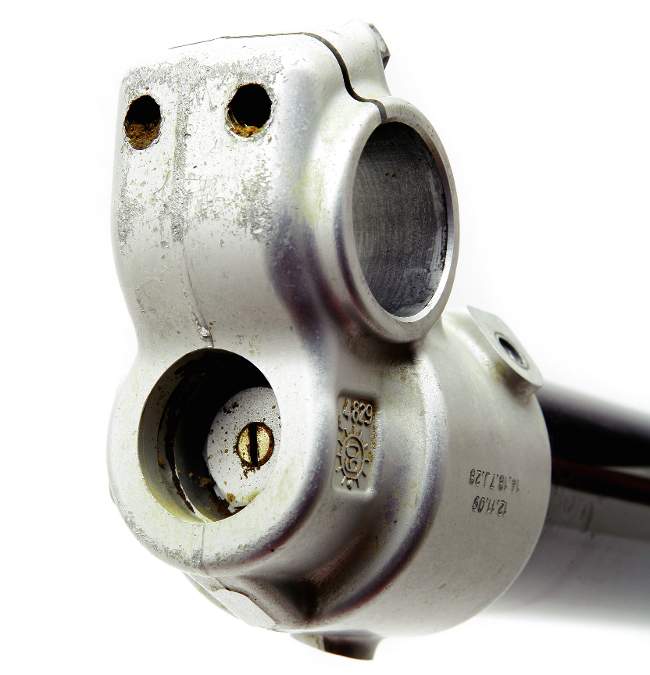
Rebound on modern forks is found on the bottom of the fork leg.
STEP SIX: KOBE AND YOUR SHOCK
Without damping to slow the up-and-down motion (rebound and compression) of the shock, the rear of your bike would bounce around on the track like a basketball. Compression damping is used to stop the bike from bottoming when hitting jumps, and rebound damping slows the shock’s return to full extension so that it doesn’t bounce into the air.
STEP SEVEN: ONE PLUS ONE EQUALS THREE
Now that you know what damping is, you probably think that you have the whole shock concept mastered. Think again. There is a third element to your shock’s damping?and it is a nasty and contradictory one. It is the spring!
The shock’s spring is both good and bad. What’s the good part? If you have the correct spring rate, the shock spring will hold the bike up so that your weight is balanced out. Too soft a spring and you’ll lose travel faster than Paris Hilton misplaces purses. Too stiff and you’ll lose travel and movement in your spinal column.
What else does the spring do? It increases compression damping and lessens rebound damping. Say what? The shock spring resists downward motion?thus it slows the shock when landing from jumps (or hitting bumps). However, after the spring has collapsed and begins to return to the upright position, it tries to overcome rebound damping. Downward spring is good; upward spring is bad!
STEP EIGHT: TOO STIFF?
A rider who weighs 230 pounds will want to run a stiffer shock spring. Because of his extra weight, the stiffer shock spring will keep the bike from bottoming. However, the stiffer spring will require more rebound damping. Conversely, a lighter rider might want a softer spring, which would require less rebound damping.
To make your shock work, you need the correct spring for your weight, track and riding style. Heavy riders equal heavy springs. Fast riders equal heavy springs. Jump-filled tracks equal heavy springs. Skinny, slow and smooth riders require lighter spring rates. How do you know if your shock spring is right for you? Measure the sag.
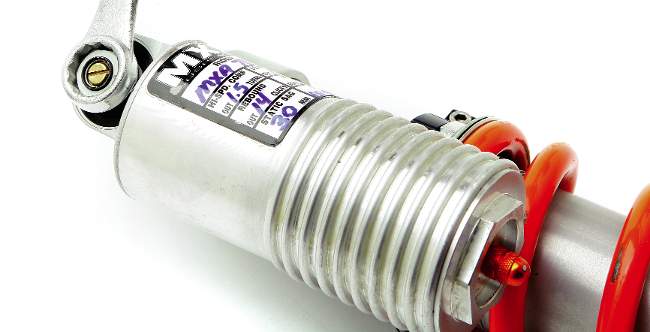
Your shock’s high-speed compression is typically adjusted with a 17mm wrench. It doesn’t click, but is measured in percentages of full turns.
STEP NINE: MEASURE THE SAG EVERY RACE
How do you measure sag? Put your bike on a stand with the rear wheel off the ground, and measure from the rear fender to the rear axle. Write that number on your buddy’s forehead. Next, remove the bike from the stand and climb on board. Once you are positioned on the bike, have your buddy make the same measurement again. Subtract the new number from the one written on his forehead. The result should be four inches or 100 millimeters (whichever comes first).
What should you do if it isn’t 100mm? Loosen the shock’s preload ring and turn the collar in the proper direction to make the spring stiffer or softer. Then, measure again and again until you get 100mm.
STEP TEN: YOU NEED TO CHECK FREE SAG
We know that you just measured the sag, but that wasn’t “free sag,” that was “race sag.” So, what is free sag? Once you have the preload set at 100mm for your weight, position the bike on level ground, grab the bike under the rear fender, and lift up?like you are going to pick the bike up off the ground. Did you feel the shock move? How far could you lift the rear fender up before the rear wheel tried to leave the ground? Was it 25mm? Was it 3mm? The amount of slop in the rear end is called “free sag.” If your shock is too stiff, you will have more than 35mm of free sag (with the race sag properly adjusted for your weight). If your shock spring is too light, you will not have any free sag.
Think about that for a second. Repeat after us?if your shock spring is too stiff, the shock will have excess free play. Now ask yourself, why? That’s simple; you haven’t been eating enough. Gain weight and you will have to preload the shock spring more, which will take up the excess free sag. If you don’t want to pork up, you should consider a lighter shock spring.
If you don’t have any free sag, your shock spring is too soft. Why? Because to hold your body up, it has to be cranked way down into its stroke. It is overstressed?so overstressed that it is working overtime to hold up the bike. Thus, it has no jangle left in the rear end. Buy a stiffer shock spring (or go on a diet).
STEP 11: SET THE COMPRESSION DAMPING FIRST
The compression adjuster is located on the shock reservoir. When you turn the screw clockwise, you make the damping harder (or slower or heavier). Turn the screw counter-clockwise and the damping will get softer (or faster or lighter).
Before you ride your bike, set the compression clicker on a base number. What number? We suggest looking at your owner’s manual and setting your compression clicker on that number.
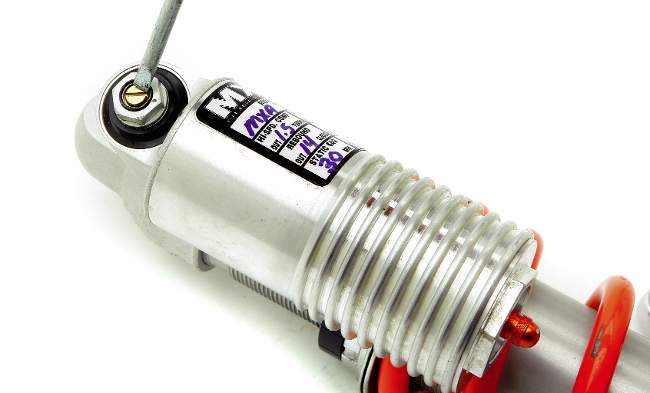
Low-speed compression is the brass screw inside the high-speed compression dial. It is primarily where your shock adjusting will take place.
STEP 12: ALWAYS THINK IN AND OUT
All clicker numbers are referred to as “clicks out.” If we suggest 12 clicks out, that means you should turn the compression (or rebound) clicker all the way in (clockwise) and then back it out 12 clicks.
STEP 13: IN MAKES IT STIFFER
“In” is stiffer, and “out” is softer.
STEP 14: HOW REBOUND NUMBERS WORK
The rebound clicker is located at the bottom of the shock. It is sometimes inaccessible without the help of a friend to push down on the bike’s seat (which moves the linkage out of the way). The rebound clicker works just as steps 12 and 13 claim. In is stiffer. Out is softer. All numbers are references to clicks out from all the way in.
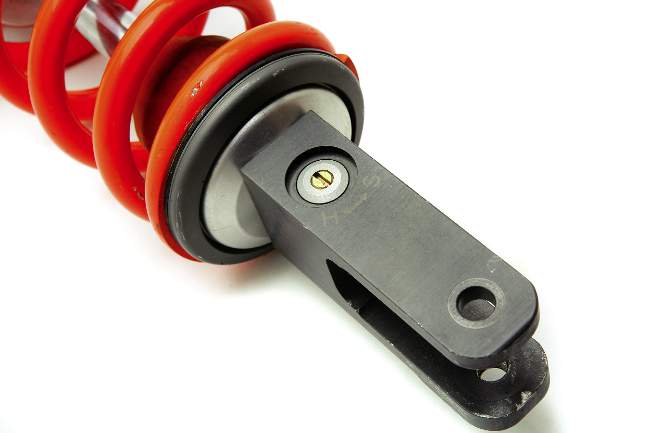
The rebound adjuster is on the bottom of the shock. As with all clickers, it is measured from clicks out from all the way in.
STEP 15: RIDE THE BIKE TO TEST THE COMPRESSION FIRST
Don’t get bogged down in trying to fix too much at one time. Once you have set your shock to the recommended settings, go ride the bike. But, remember, you are only riding it to test the compression damping. Follow these steps:
(1) Go over a jump and some whoops. Did your bike bottom? If it did, stop and turn the compression clicker in two clicks (in is stiffer).
(2) Go over the jump again. Did your bike still bottom? If it did, turn the compression clicker in two more clicks. Repeat until the bottoming stops.
(3) Next, ride the complete track. Does the shock feel too harsh? Turn the clicker out one click. Does it feel wallowy? Turn the clicker in one more click. Don’t expect miracles, because you are only working on the compression damping. The whole package won’t come together until you work on the rebound.
STEP 16: REBOUND IS JOB NUMBER TWO
To set the rebound, follow these steps:
(1) Once you have selected a compression setting that you think feels spot-on, ride over a jump or through a set of whoops fast. Have a friend watch the rear of the bike. If the rebound is too fast (light or soft), the rear wheel will skip off the ground when landing from a jump or kick off the ground over a series of whoops. Stop and turn the rebound clicker in two clicks.
(2) Go over the jump and through the whoops again. If it still kicks, turn the knob in two more clicks.
(3) You have to be sensitive to tell what is happening. Why? Because slow rebound will make the rear end kick as much as fast rebound. Take the time to try as many clicker settings as it takes.
(4) The goal of rebound damping is to slow the rebound down enough to keep the rear end from skipping off the ground, but not so much that the shock hasn’t returned all the way up before the next bump is hit. This is a fine line. You want the rear end to re-cock in time to have full travel for the next bump, but not so quickly that it unweights the back of your bike.
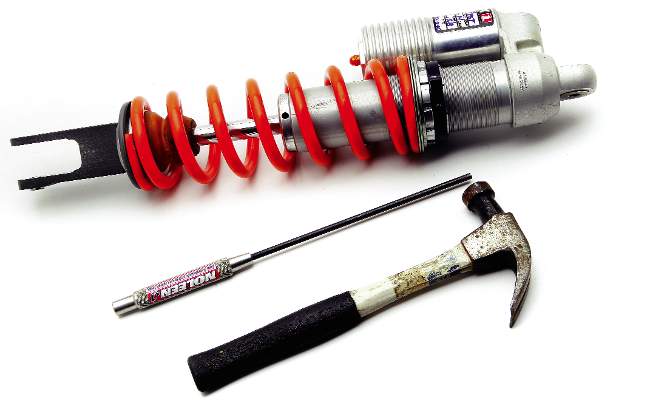
To adjust the preload on the shock spring you need a hammer and a punch (except on the new KTM’s).
STEP 17: REBOUND KICKS LIKE A MULE
When the rebound setting is wrong, the bike will kick. This simplifies the shock setting somewhat, because compression damping will not cause kicking. Only rebound causes kicking; however, choosing between too fast and too slow requires trial and error (or an expert observer).
STEP 18: RESET THE COMPRESSION CLICKERS
Once you have settled on the proper rebound setting, go back and run your compression test again. Why? Because even though rebound and compression are separate motions, turning the rebound in will affect compression damping. Slower, heavier or harder rebound will have the same effect on compression?although to a smaller degree.
STEP 19: TRY TO IGNORE HIGH-SPEED COMPRESSION
Many modern bikes have high-speed compression adjusters (the big knob). The best way to use the high-speed compression adjuster is by feeling, via seat-of-the-pants testing, the in-motion ride height of the chassis. Ask yourself these questions: Does the rear end feel low? If it does, turn the high-speed compression knob in. Does the rear end feel high? Turn the high-speed compression knob out.
STEP 20: A SHOCK IS A LIVING THING
A shock is always changing. When the oil gets hot, the shock’s damping gets softer. However, when the nitrogen in the shock reservoir gets hot, it expands and makes the compression damping harder. If you put these two facts together, you will find that at the end of a long moto, your bike will rebound like a mule and the compression will jar your eye teeth. Old oil loses viscosity and makes your shock faster. As springs age, they take a set. You have to constantly adjust the sag. A cold shock will have a different race sag than a warm shock. Set race sag after practice if possible.
A shock is a living thing, and you have to learn to live with it or die trying.


Comments are closed.